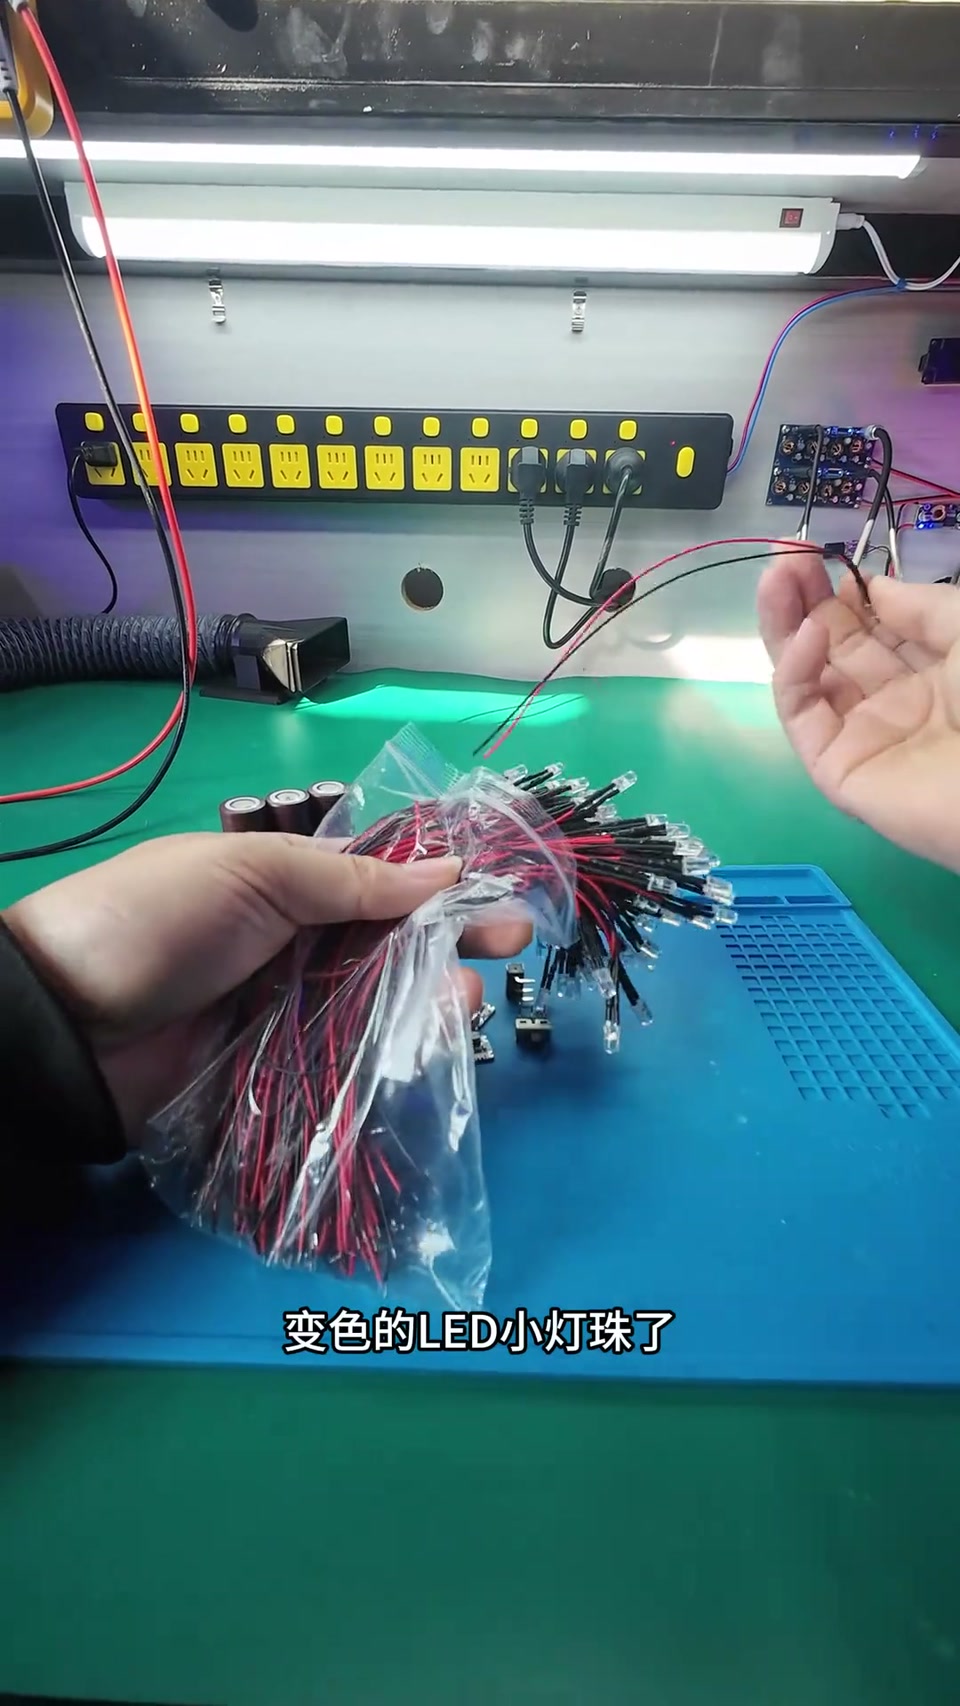
78 × 18650 cells welded. Arms are sore, heart is full
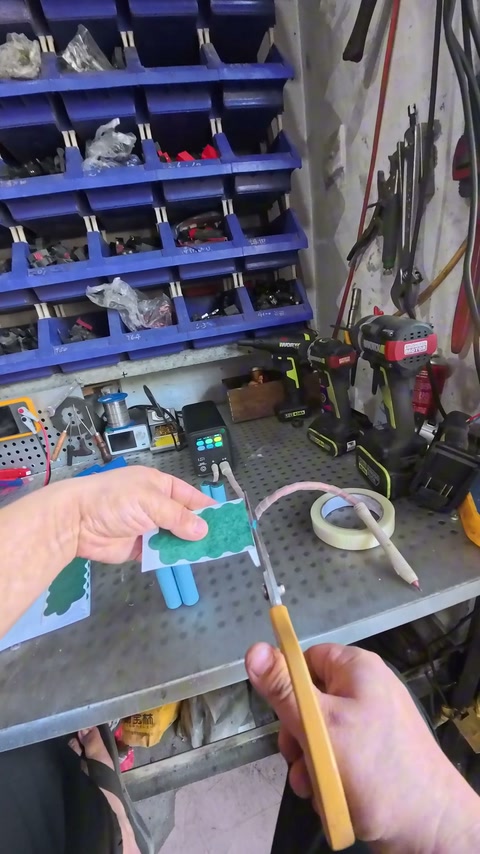
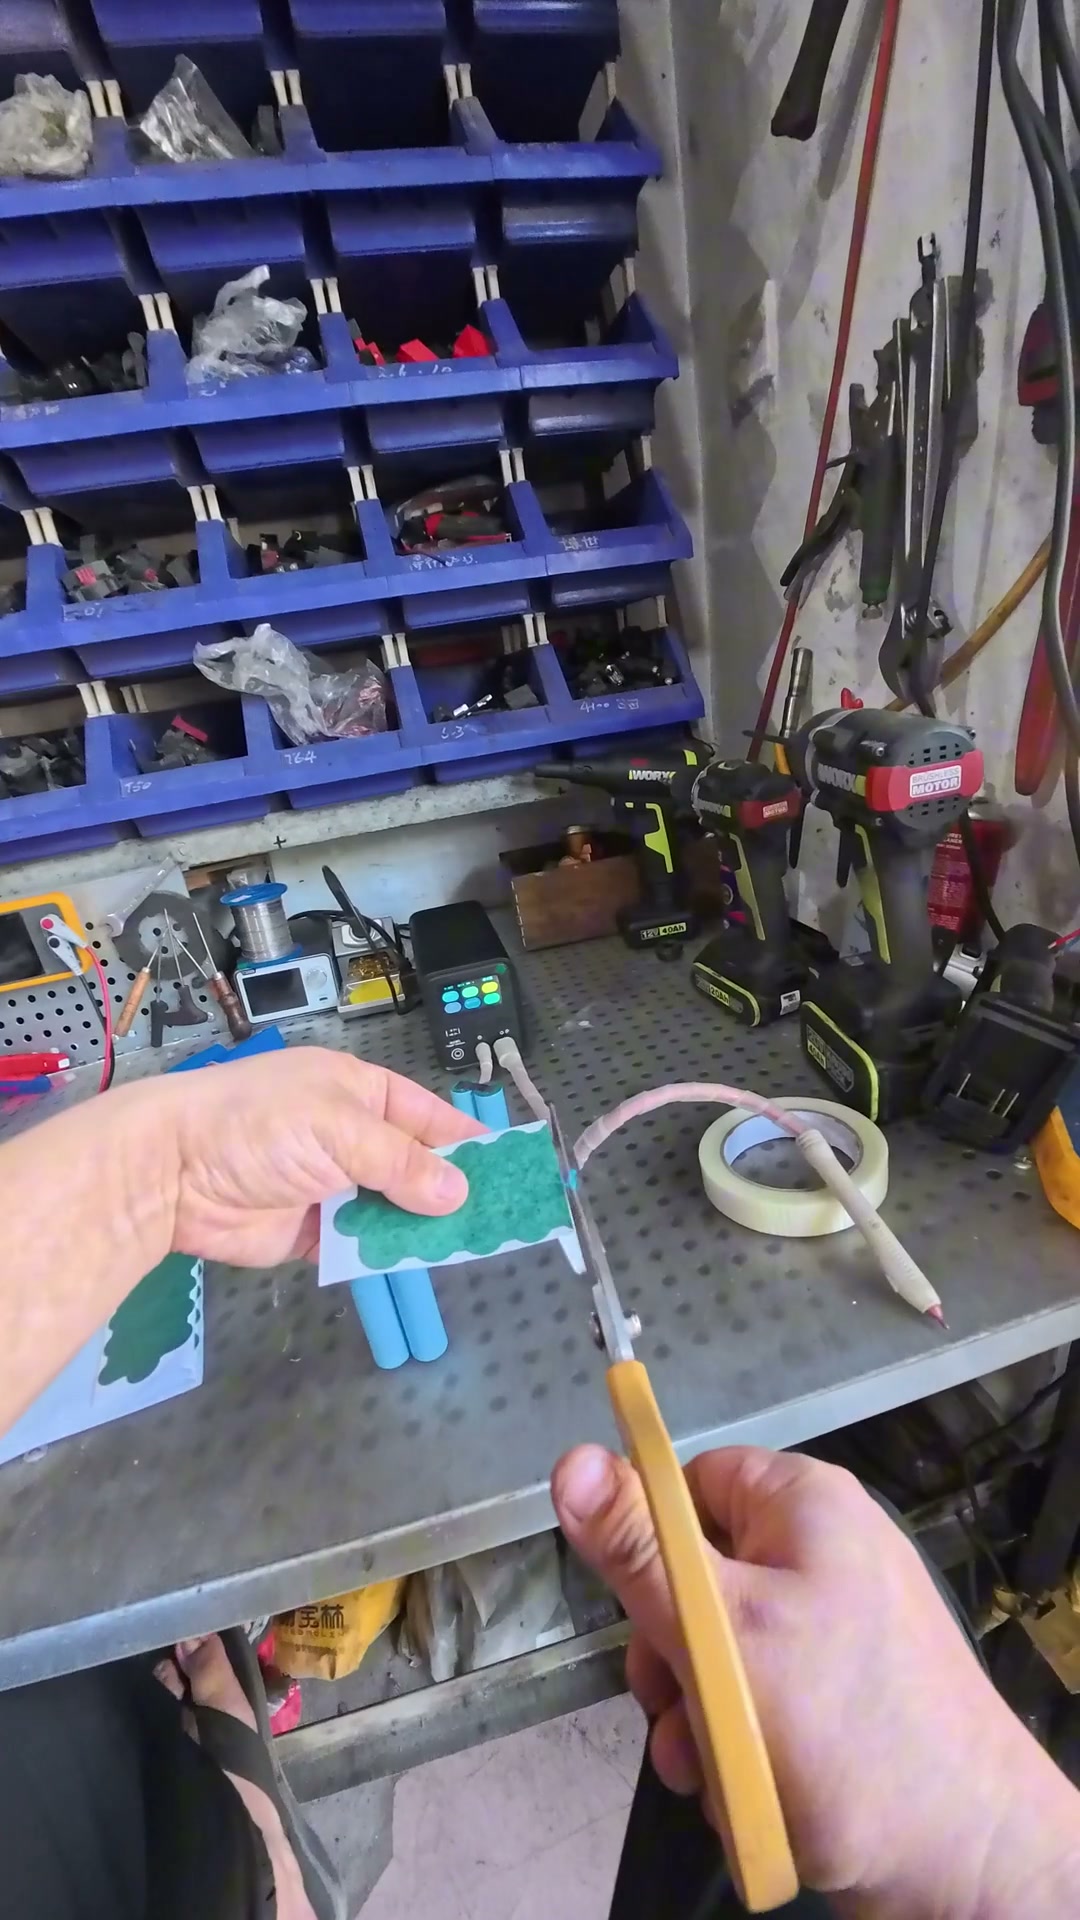
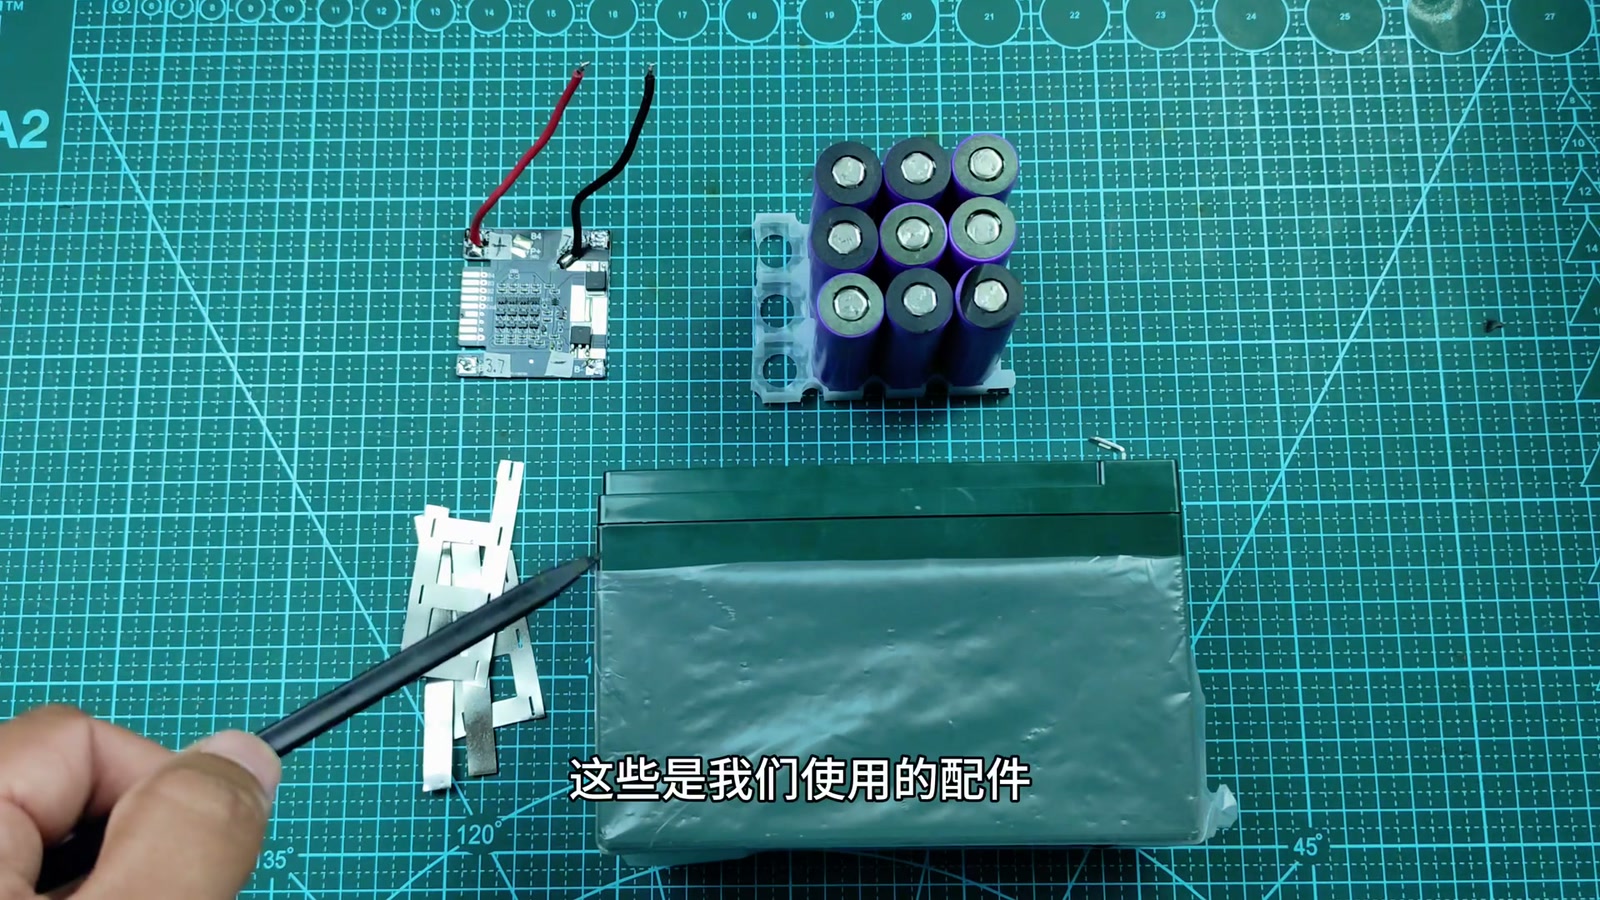
The customer's old case is only 130×370, so I measured three times before I dared to cut anything. 13S6P, 0.2 nickel-plated strip, UF20B at gear 38 — watching the welds light up one by one is seriously addictive.
Halfway through, the welding pens touched and blew a hole right through one cell. Swapped it out and started over — newbies, remember this: position first, then press. Don't rush.
BMS goes in tomorrow, it goes back to the customer the day after. Will report back.
My 220V portable power station finally works — hot pot in the backyard tonight
54 × 18650, 3S18P, 12.6V 36Ah. The inverter does 600W continuous, 1200W peak. The moment I plugged in the rice cooker my heart was racing — rock solid!
Welded with the P60F, double-layer nickel strip in one pass, not a single cold weld. It took two evenings; the hardest part wasn't the welding, it was cramming this pile of modules into the storage box and still leaving room for airflow.
The video shows the whole process. If you want to build one, follow along, and ask questions in the comments.
My first self-welded power bank, 20000mAh, and it lights up!
I was always too scared to touch spot welding — afraid something would blow up. The day my U3 Pro arrived I practiced on scrap nickel strip all afternoon, and today I did it for real.
Six salvaged cells, sorted by internal resistance. Tested it with a flashlight after welding: in 38 minutes it charged my phone full twice.
Grinning like I'd found money on the street. My wife says I'm acting like a kid. Yep.
6S2P 21700 long-range pack, my entry for the #21700 power-pack challenge
You only find out how many pitfalls there are once you build your own FPV drone packs: the negative side of tabless 21700s is really current-hungry — I had to push the UF20B to gear 52 to get full penetration.
Paired it with a 40A BMS and measured every cell's internal resistance before welding; max spread 2mΩ. Flew three packs, and the shell wasn't hot when I touched it after landing. Happy.
The recipe is attached to the project. Judges, please go easy on me.
Picked up another UK1 — this time it really does go in my pocket when I head out for repairs
Click the knob, press the tip, and you're welding. For house calls fixing shavers and electric toothbrushes I used to haul a big bag; now it's just a UK1 and a roll of nickel strip and I'm out the door.
Still got a little thrill from the unboxing — the box is really nicely made. 0.15 nickel-plated is easy; 0.2 needs gear 70 or higher.
The downside, to be fair: the battery is built in, so after a lot of welds you have to stop and let it recharge.
Built a flashlight that lights up half the street for under 20 yuan
Three 18650s plus an e-bike headlight, with a water pipe for the housing. Welded the nickel strip with the H1 — tiny little thing, handles 0.12 strip with zero effort.
Switched it on outside at night and the neighbors thought someone had left their car headlights on. Hahahaha.
Pic 2 shows the internal wiring, for anyone who wants to copy my homework.
Converted a soldering iron to lithium power, pack welded with the UF20B — version 2
The wires in v1 were too thin and got hot, so this time I went with 2S 21700 plus a 30A BMS, and double-layer nickel strip.
This machine is seriously small — it sits in a corner of the bench without taking up space, recharges in a few seconds, and I welded 40 spots in a row without ever having to wait.
Best part when it was done: not a single spot needed re-welding.
The full 21700 custom pack process, from cell selection to wrapping — filmed it all in one go this time
Capacity grading, matching, welding, fitting the BMS, heat-shrink wrapping — five steps. For the welding step I used the UK1, 0.15 nickel-plated at gear 60, just right for full penetration.
The one thing I most want to say: matching matters ten times more than welding. If cells from the same batch differ by more than 5mΩ in internal resistance, no amount of good welding afterwards will save it.
The most-asked question in the comments, "how much per pack?", is answered too — in step 4 of the project.
Butt-welded 6.0mm steel plates — the P120D is a beast
I'm building a bracket for a turbine afterburner. Tried several machines and none of them could weld 6mm steel plate. Cranked the P120D to gear 999, one loud crack, and the two plates became one piece — can't knock them apart with a hammer.
Industrial-grade stuff is just on another level; even the sound is scary. Wear your hard hat and safety goggles — the spatter is real.
Getting into FPV drones on a budget — welding my own packs cut the cost in half
Four 4S packs, under 60 apiece. Welding was the easiest step; getting the balance lead wiring order right was what really strained my eyes.
My palms were soaked with sweat on the first flight. Crashed once and broke a prop, but the pack came through fine.
To anyone wanting to get into it: learn spot welding first, and everything after that is just saving money.
Finished my universal magnetic base — no more messy workbench
3D-printed shell + strong magnets + a 2S battery pack, welded with the U3 Pro. The step-by-step tutorial is in the project, print files included.
The happiest moment in any DIY build: the last screw goes in and the thing actually works.
12V portable power station pack, my first build, lit up on the first try
18650 in 3S8P, U3 Pro at gear 55, 0.15 nickel-plated strip. I'd watched a dozen-plus tutorials and still didn't dare start. Once I actually did it, it wasn't that scary, and the welds are stronger than I expected.
The moment the light came on at the campsite — totally worth it. Thanks to everyone in the comments who taught me.
Swapped the batteries in the flashlight and the shaver — fixed four things around the house in one afternoon
The H1 is the handiest little tool I've ever used: handheld, rechargeable, fits in a pocket. The cell in the shaver had swollen, so I put in a new one, two welds, put it back together and it buzzed to life — Grandpa's shaver, ten years old, lives again.
The joy of these little fixes — if you know, you know.
Old Panasonic 21700 cells saved from RC crashes built into 6S2P 8000mAh: 40A power cells short and catch fire easily, fish paper on both ends, nickel-plated steel strip laid along the current path for series-parallel and welded, 3.5V per cell / 22V total, 6S balance leads welded (red positive, black to each group negative) and each port checked for rising voltage, then a flight; ‘don’t copy this, even Wang Duoyu wouldn’t fund it’
Crash after crash flying RC has left him a pile of Panasonic 21700s, and he rebuilds these battle-hardened veterans into 6S2P. These power cells discharge at 40A and heat up and catch fire easily if shorted, so before assembly fish paper goes on both ends of each cell; nickel-plated steel strip links them up before welding: add a piece here, join underneath with this one, join again with this one, the current comes up here, goes down, turns the corner, up and down, weld the bottom on (explaining the series-parallel routing). Multimeter shows 3.5V per cell, 6S is × 6, about 22V, fine; then weld the charging balance leads: red to positive, black to each group’s negative; check each port with the meter, the voltages step up in order, so the charger can balance every cell and fill them together; the full 6S2P 8000mAh is done and goes up for a flight. Comments: link for the welder?; discharge rate (10C); what voltage did you weld at; does vertical vs horizontal layout affect current handling; where to buy “lollipop” cells and what brand; make me a 36V; three aircraft gone for good.
Repairman Xiao Li’s tool recommendation: repairing power tools you can’t do without a spot welder, split into small / medium / high power — the small handheld for a hundred-odd yuan, switch on and weld, on and off as needed, for people who use it a few times a month on four or five cells; the medium type needs the box opened and wired up but is also handy; high power suits people who build Li-ion packs all the time; he owns small, medium and large but uses the small one most; a reminder that Li-ion in bulk, especially while charging, is risky
Repairing power tools all the time, you can’t avoid using a spot welder; there is low power, high power, extra-high power, and this one counts as medium. Low power suits people who don’t use one often and only occasionally build two or three or four or five cells — a few times a month at most, buy the small type, a hundred-odd yuan, switch it on and click away, very handy, on and off as needed. The medium type means opening the box, taking out the main unit and hooking up the leads before welding, also handy, a bit more power. High power suits people who build their own Li-ion packs all the time for fun, also very good. Watch safety with Li-ion: two or three cells don’t matter, doing them in bulk is a little risky, especially while charging. Not often, occasional use: buy the small one; using it all month: buy medium or high power — what suits you matters. I have small, medium and large, but I use the small one by far the most, two or three times a month, sometimes not even once; I like the small one, grab it and go. 2 comments: ‘AWithZ Li-ion spot welders suit individuals / small repair shops, industry-leading, good materials, no corner-cutting, miles ahead of the rest’ (sounds like official / promotional copy).
Master Zhang opens a follower’s ‘48V15Ah Panasonic’ e-bike Li-ion battery: feather-light, foam stuffed down both sides of the box, actually unbranded 18650 knock-off cells in 13S3P; rebuilt as 15Ah with 78 × EVE 2.5Ah 18650 (13S6P), 0.2 nickel-plated steel strip, capacitor spot welder with 4 welds per cell, checked for wrong / missed welds, BMS fitted and charge/discharge tested; warning: any pack labelled CATL / Panasonic cells is fake
A follower from out of town sent in a 48V Li-ion e-bike battery, label says 48V 15Ah Panasonic cells, made 2023-12; it feels feather-light in the hand, clearly not 15Ah, range is very short and nowhere near the kilometres the seller promised. Off with the top cover: the cells only take up a little space in the middle, the rest is foam padding, the block is very small; inside it’s 18650s, 13S3P, the wrappers carry no brand or capacity info — typical knock-off cells, you can imagine the range; this battery is worth nothing. Rebuild as 15Ah: brand-new EVE 18650s at 2.5Ah each, 6P13S; place them in the holder alternating + up / − up, lay one row first as the reference, mind the orientation and don’t get it wrong; snap the top holder on to make one block; the connecting material is 0.2-thick nickel-plated steel strip cut to the needed lengths; the welder is just an ordinary capacitor spot welder — 18650s don’t need much current; 4 welds per cell to guarantee current-carrying strength; weld the parallel and series links in order, then check the whole block for wrong or missed welds; fit the BMS, charge and discharge test, no problems and it’s done. Warning: when buying a battery, any pack whose cells are labelled CATL, Panasonic and the like is fake. Comments (343): how much for a 48V30A build (2); 12C 25P cell config is overkill, 5C is enough (2, doesn’t match this video); selling fakes is a crime, jail (1); which courier did you use (1); how much for 48V25A; how much to rebuild a Sunra; you can tell it’s only a few Ah just by looking.
Diangongbang’s 13-second sales pitch (same script as w113): a handheld rechargeable spot welder that welds nickel strip onto batteries / stainless steel very solidly, welding power and time adjustable, charges from a phone charger; comment: an H1 owner says the H2 upgrades the screen and features, more professional
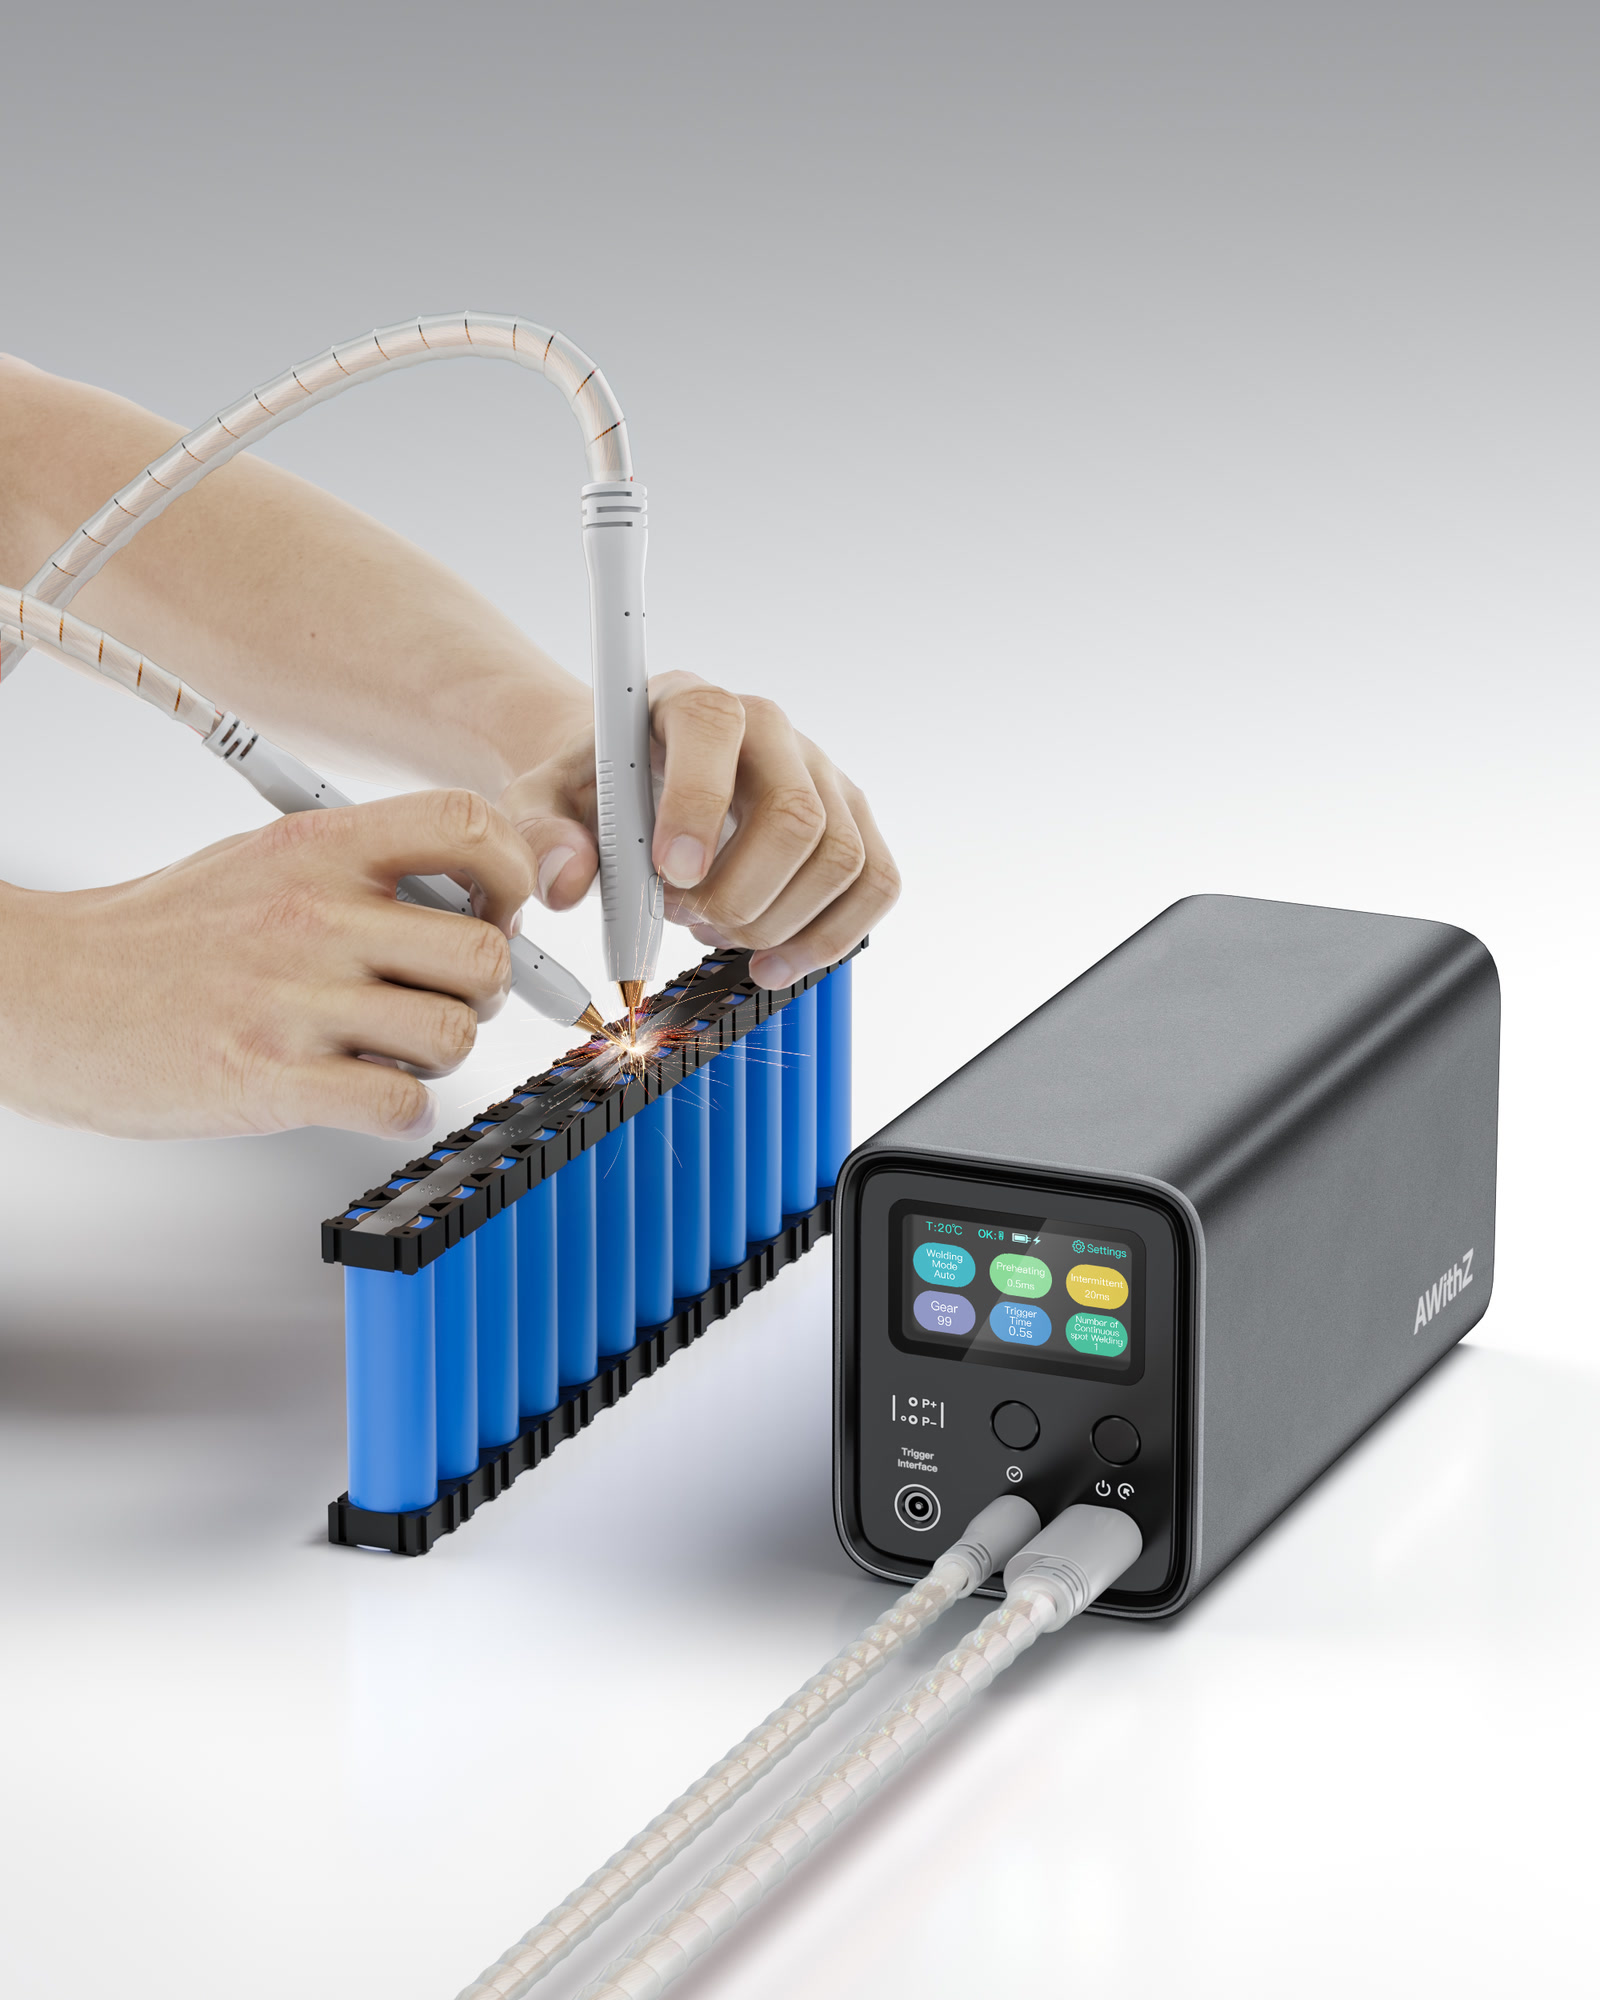
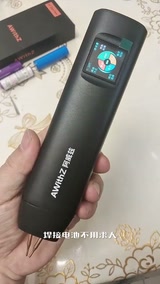
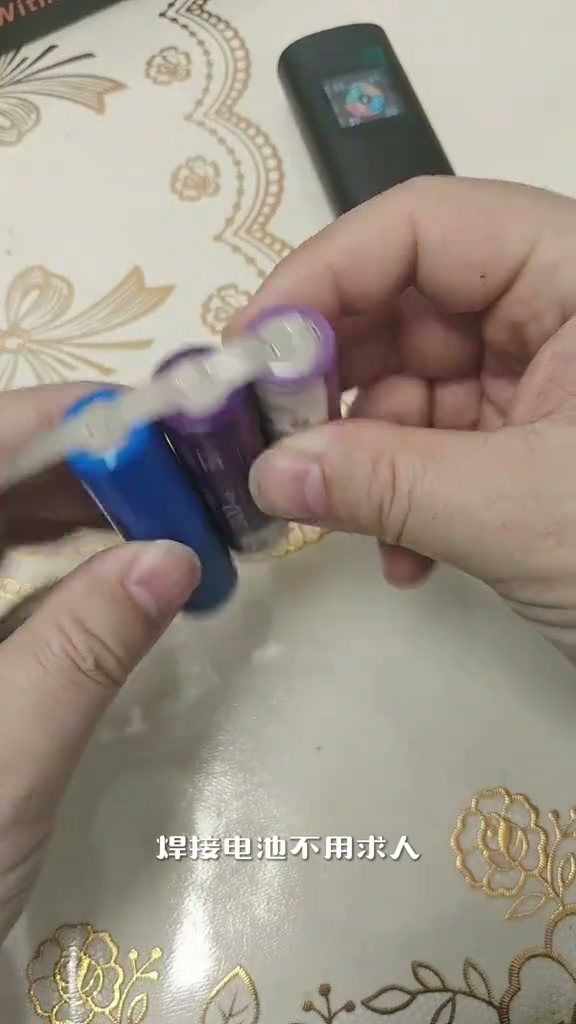
No need to ask for help or use a soldering iron for battery welding; a handheld rechargeable spot welder that welds nickel strip onto batteries and stainless steel, very solid; welding power and welding time both adjustable; charges from a phone charger, really convenient to use. Screen shows 4ms, T 21℃. Comment: thumbs up for the AWithZ handheld welder, bought the H1 before, this H2 upgrades the screen and features, looks more premium and professional.
A Xiluopu scooter’s 48V21Ah Li-ion pack is dead after two-plus years without charging (green light stays on, won’t charge; opened up it smells of electrolyte and the cells are corroded through), so it is rebuilt as 13S4P EVE 18650 2.5Ah = 48V10Ah: fish paper, alternating + / − rows in a jig, no holder with an epoxy board between each series group, 0.2 nickel-plated steel strip welded on both faces watching for missed or loose welds, strapping tape wrap, harness soldered to each group’s tab, BMS fitted and wired, awaiting the charge / discharge test
A Xiluopu scooter Li-ion pack sat for over two years without charging; on the charger the green light stays on and it won’t charge; after two years unused the chance of waking it is very small, most likely dead; label says 48V 21Ah; opening the epoxy board releases a strong sour electrolyte smell, many cells are corroded through by leaked electrolyte, 100% not worth repairing. The customer decides on a rebuild: the scooter is only for getting around and doesn’t need that much capacity, 10Ah is cheaper; new EVE 18650 cells at 2.5Ah each, 13 series × 4 parallel = 48V 10Ah. The cells, with fish paper on, are laid into the jig in 13S4P order, one row positive-up, the next negative-up; the scooter case has no room for holders, so it is a holder-less design with an epoxy board between each series group for insulation; 0.2 thick nickel-plated steel strip spot-welded, the welder set to a suitable current, every cell welded, watch for missed or loose welds, weld both faces, leave the main + and − out. After welding, wrap several turns of strapping tape so it becomes a solid block that won’t come apart under vibration. Fish paper where the harness runs and where the BMS sits; the BMS harness is soldered in order to each group’s tab; the BMS is fitted and the + / − power leads connected; assembly done, only a charge / discharge test to pass and it’s finished. Comments: with alternating rows do the + and − have to be on the two sides; the positive lead is too long, should be thicker (2); how much for a pack (many); how much for 48V20A; do you sell batteries; address.
Diangong Bang's 13-second H2 pitch: weld cells without asking anyone for help or using a soldering iron, handheld and rechargeable, nickel strip welds solidly onto cells / stainless steel, no welding guide needed, weld time adjustable, charges from a phone charger; the only comment: great for 18650/21700, keep one at home and save on repair bills
Weld cells without asking anyone for help or using a soldering iron; handheld rechargeable spot welder; welds nickel strip onto cells and stainless steel, extra solid; no welding guide needed, weld time is adjustable; charges from a phone charger; very convenient to use. Title: colour screen with adjustable weld mode and strength, handy for repairing and DIY-building packs. 1 comment: the AWithZ handheld spot welder is good, great for 18650 or 21700, keep one at home, fix your own batteries and save on repair bills.
Abiao hand-builds a portable rechargeable mini drill press (11 minutes, open-sourced on MakerWorld): 795 motor 12–24V, 20/60-tooth pulleys, tapered / linear bearings, shafts, 3D-printed parts; 6 × 18650 2600mAh 10C in 6S + 35A balancing BMS + IP2369 45W 2–6S charge/discharge module + meter + rocker switch, one balance lead per series group, first power-up needs 2–3V extra to activate, 21V output; v1 had the tapered bearings fitted the wrong way and melted from friction, remodelled and perfect: square steel cut like tofu, threaded rod drilled most of the way through
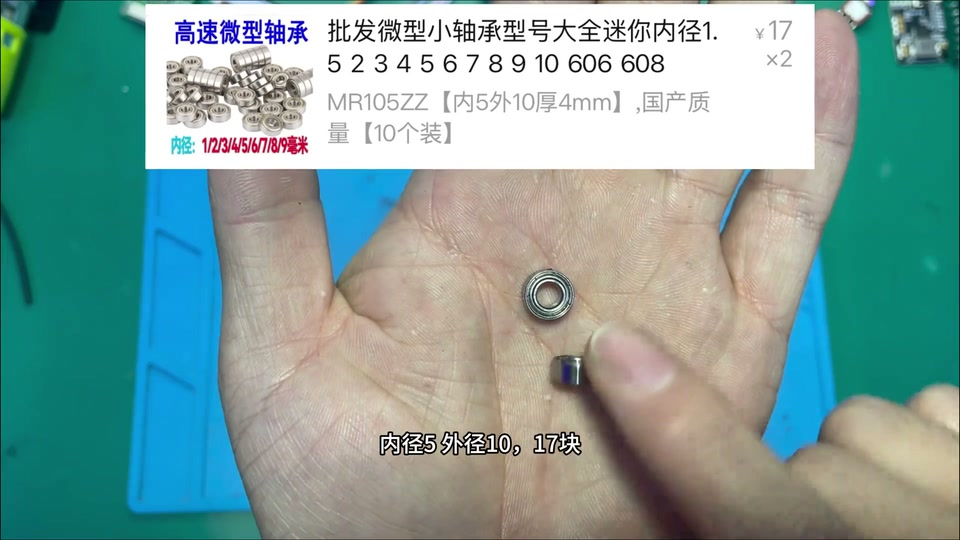
He had a set of pulleys but no mini drill press, so built a portable rechargeable desktop drill press with no cord; drills square steel like cutting butter and even large threaded rod. Materials list (with prices): 795 motor 12–24V ¥28.9, drill chuck + 5mm adapter ¥15.28, 20/60-tooth pulleys ¥12.1, two tapered roller bearings (10mm bore) ¥10, linear bearing ¥5.5, flanged linear bearing ¥15.2, 10mm shaft 40cm (¥17.5/m), 5mm shaft 10cm (¥39.9/10), M6×90 hex socket screws ¥3.73/5 sets, small 5×10 bearings ¥17/10, springs ¥4.3/10; electronics: 6 × 18650 2600mAh 10C (¥343 per 100), 6S 35A balancing BMS ¥23.74, DC 7–100V charge meter ¥10.9, IP2369 PD 45W 2–6S charge/discharge module ¥21.3, 6mm rocker switch ¥1.9; if you don't want Li-ion, skip the cells and BMS and run direct DC; if you don't have a spot welder and other professional tools, better not build a Li-ion pack. Battery: main positive and negative brought out on nickel strip to the BMS; many people struggle with balance leads, just remember: from negative to positive, one per series group, sampling each group's voltage; fit the balancing BMS and spot-weld the negative, plug in the balance leads; some BMS boards need an input 2–3V higher than the pack for a second or two on first power-up to activate; measuring around 21V output means it's active. Mechanical parts modelled to size, free and open-source on MakerWorld, PLA printing takes four plates and a dozen-odd hours, ¥20-odd in filament. Assembly: cells into the box recess, fit the charge meter, main positive reserved as a lead, charging module glued in at the Type-C cutout; meter negative, charger negative and main output negative all go to the BMS negative output; BMS charge input lead to the charging module negative, the other to the module positive, flick the module's little switch and the light comes on, working normally, Type-C both charges and can discharge to a phone; the pack positive's other lead goes to the switch's centre pin (input); output load lead, meter positive and sense lead twisted together onto the switch output; switch into its reserved hole; power on, meter lights up, close the lid; tap the shaft into its round hole. Head: small bearings top and bottom, tapered bearing (10mm bore printed adapter down to 5, tight space makes it a struggle to fit, a design failure), drill-bit adapter, flanged linear bearing with 4 screws, the other linear bearing, chuck, motor bracket with 4 screws, motor, small pulley grub screw, belt (better to fit the belt before the pulley); turntable base with two screws, loosen/tighten to adjust table height; the bottom clamp's third set of hex screws adjusts bit angle; springs on the two vertical rods; the handle's pivoting link copies an old hand-pump well, copper wire through the outer hole to stop it slipping off; power leads to the motor, dust cover. Test drill: after one hole it wobbles and vibrates badly, the shaft isn't vertical, the head model has a serious problem; taking it apart shows the plastic already fused and scorched; while drilling the bit pushes upward, rubbing the plastic until it heats and melts; remodel so the tapered bearings go in from the outside, one top and one bottom, stopping upward push and downward drop, the bearing inner race spins with the bit without rubbing; found that the small bearing's 10mm OD works as a reducer for the 5mm shaft; nearly two hours to reprint, fitting difficulty and friction heat perfectly solved; square steel like tofu, threaded rod not quite all the way through but close, good enough for a desktop mini drill press. Comments: made one too (4); don't cost it at 10cm, nobody sells 10cm; how much do you spend a month on inventions; add a fixture to turn beads; make it waterproof to cut bottles; main column too thin and too many plastic parts, poor rigidity, fine for fun; the rear column needs a really thick tube; can you make a mini table saw (tutorial coming).
Li-ion tech Zhang re-cells: a customer’s 48V “15Ah” battery (made 24-09) goes green as soon as it’s plugged in and won’t charge or discharge; inside are salvaged old 18650s in 13S4P, really 10Ah, many leaking, crude workmanship; cells scrapped, BMS kept, rebuilt as 48V10Ah with 52 brand-new EVE 2.5Ah 18650s (13S4P), 0.2 nickel-plated steel strip on a capacitor welder (preheat 0.05ms / interval 20ms / gear 29), pre-cut insulating paper where the sense leads run, tabs welded in order and checked before connecting the board, 49.5V/4.92A charge/discharge test
Opens with the customer: the battery hasn’t lasted well since 2024, used to charge for three hours, now goes green the moment it’s plugged in. Label says 48V 15Ah, made 2024-09; the problem is it won’t charge or discharge. Opened up: cylindrical 18650s; the case says 15Ah, but the cells are 2.5 each in 4P, really 10Ah; clearly salvaged old cells used a second time, many already leaking; very crude workmanship; he decides to scrap the cells and rebuild with brand-new ones; the only usable part of the old pack is the BMS, removed for reuse. Rebuild: 18650 at 2.5Ah each, 48V10Ah needs 13S4P, 52 cells, brand-new EVE; laid into the holder one group positive-up, next negative-up; series raises voltage, then 4P adds capacity. Welding uses 0.2 nickel-plated steel strip on a capacitor spot welder, settings on the screen (preheat auto 0.05ms, interval 20ms, gear 29, trigger 0.6s, continuous); the process is simple as long as nothing is missed; check for missed or wrong welds afterwards. Fit the BMS, usually on the negative side; pre-cut insulating paper where the sense leads run; tidy the ribbon and weld it to each group’s tab in order — the order must not be wrong; the sense leads monitor each group’s voltage and cut the BMS circuit if it goes too high or too low; to avoid mistakes, after each weld the lead order is checked on a test board before connecting the BMS. Finally the + and − power leads go on, a proper charge/discharge test (49.53V 4.92A), then insulation, back into the case, done. 16 comments: are the EVE 25Ps genuine (print and barcode misaligned); how much for a pack (1); how much for a 48V50Ah for a ride-share bike; how much per cell; are you in Shenyang; the original didn’t even have a holder; what BMS is that small.
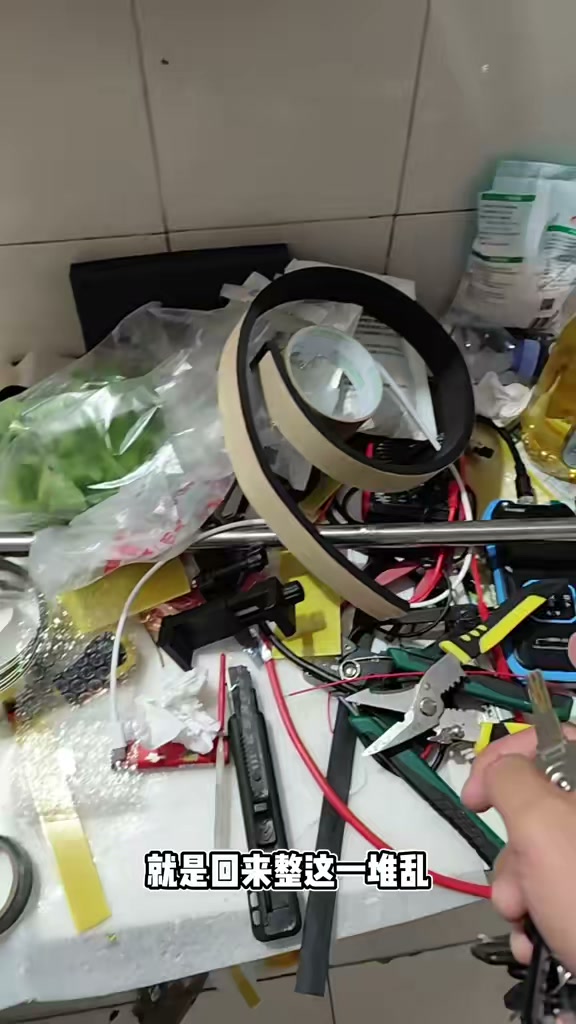
Sized to the customer’s old case: 78 × EVE 2.5Ah 18650 cells in 13S6P for a 48V 15Ah e-bike pack
A customer sent in a 48V e-bike battery case whose cells were dead. The creator measured the inside (130 × 370), worked out that 13S6P would fit, and chose EVE 2.5Ah 18650s — 78 cells for 48V 15Ah. Cells go into the holder alternating positive-up / negative-up (parallel across, series down), get spot-welded into one block with 0.2mm nickel-plated steel strip on both faces, with the main positive and negative brought out separately. The pack is wrapped in strapping tape, the BMS is fitted with its balance leads soldered to each series group in order, the input/output leads are connected, and a charge/discharge test (49.14V / 6.50A on screen) is run before delivery.
An appliance repairman's day: herbal decoction pot not powering on (both switches fine, 23MΩ resistor dead, tried a 200Ω/300W, broken wire, LED burnt, charged ¥10); cordless vacuum with short runtime re-celled with domestic grade-A cells (internal resistance 13.44–16, consistent; spot-welded at gear 16, 3.8V all round, 13.5W/500mA charging normal); smart washing machine that keeps filling and never washes, water-level sensor replaced and sealed, ¥50
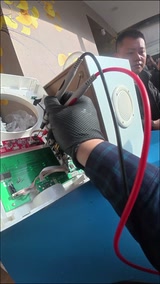
First-person repair vlog. Job one, a herbal decoction pot whose light won't come on: both switches fine, resistance reads 23 megohm which is wrong, the resistor is definitely dead, try a 200 ohm (spoken as 240; 499W trips, 300W), burn two resistors and watch the little lantern; the wire is broken too, and after the controller is repaired and powered the LED burns out again; oh well, fix it anyway, charge ¥10. Job two, a cordless vacuum with short runtime: open it up and test the battery; remove the fish paper on both sides; fit new domestic grade-A cells; measure each cell's internal resistance 13.44, 14.60, 15, 16, keep the resistance consistent; spot-weld at gear 16; after welding, voltage 3.8/3.8 OK; charging at 13.5W 500mA, charging is right. Job three, a smart washing machine: keeps filling non-stop and won't wash even when full, carried in; with no power the water doesn't come in with the tap open, but starts the moment it's switched on; check for air leaks; fit a new water-level sensor, sealed with glue, no test needed, 'the thing that senses the water level'; ¥50; glue dries overnight, test tomorrow; 'next time you need me it'll be after New Year'; perfect fix. Comments: can a TV that got knocked be fixed, can a broken clip be fixed, the Taiyuan folks want to visit, good skills and fair prices, why isn't the son on camera.
Abiao from the village DIYs a portable rechargeable belt grinder for knives (903 likes): belt-grinder head kit ¥44 + 795 motor ¥28.9, a heat-shrunk bushing to fit the shaft, 3D-modeled and printed base / housing / motor bracket (promised open source); battery 9 × 18650 2000mAh 5C (¥3 each) in 3S3P 12.6V 6000mAh, nickel tabs spot-welded in a “box” pattern for the parallel / series joins so the balance board works, fish paper on, 3S 60A separate-port balance BMS ¥6.1, Type-C charging module ¥11.8, battery meter ¥10.9, latching lit button ¥6.9, 6-pin rocker switch for forward / reverse, ¥15.3 buck-boost stepped up to 24V to make the 795 more brutal; total cost ¥100-something; sharpens well; comments: isn’t the bottom of a bowl good enough, add a rest to fix the angle, does dry grinding anneal the edge (no)
The kitchen knife is blunt; experts use a whetstone, I’m a novice, so build a portable rechargeable belt grinder: forward / reverse adjustable, charge display, a neat power switch, stepless like a gas pedal; kitchen knives and machetes come up sharp with a quick pass, belts are swappable, one minute and it cuts vegetables like tofu; cost ¥100-something. Core parts: belt-grinder head kit ¥44 (comes with 5 belts, drive wheel / idler); 795 motor ¥28.9 (with mount and dust cover, 200W). Assembly problems: the motor shaft is smaller than the drive-wheel bore, so buy 5mm ID / 8mm OD bushings (¥19.5 for 5), heat the drive wheel so it expands and drop the bushing in, then lock the grub screw to clamp the motor shaft; the frame holes don’t line up with the motor holes and can’t be drilled (the original design wasn’t for a 775/795), so he models a base and housing (with battery bay and slots for the electronics) plus a motor bracket, 3D prints them, and will release the models free and open source; two screws hold the bracket to the motor, the other side to the steel frame, drive wheel fitted; changing a belt means removing the idler; a quick power-up to fine-tune the idler until it runs smooth. Battery: for portability, 18650 2000mAh 5C-discharge at ¥3 each, 9 cells for 12V (3S3P, 12.6V 6000mAh); battery meter DC7-100V ¥10.9; forward / reverse via a KCD1 6-pin 3-position rocker switch, ¥13 for 10; Type-C 3S charge-management module ¥11.8. Spot-weld the nickel tabs on; note the parallel / series joins are welded in a “box” pattern so the balance BMS actually works, otherwise it only balances one group; wrap in fish paper for insulation and heat isolation; fit the 3S 60A 12.6V balance BMS (¥6.1) — separate-port, so both input and output leads must be connected; pack goes into the printed box, input side to the Type-C charging module, plug in and it charges normally. Fit the lit metal latching button ¥6.9: switch input to the pack’s output positive; button negative and meter negative twisted into one lead; meter positive, sense lead, switch output and switch positive twisted into one lead; the negative lead to the pack’s output negative; into the input of the adjustable buck-boost module ¥15.3, then the master switch; the light comes on, so the wiring is OK. Forward / reverse rocker switch: the middle pins are the power input, and whichever of top or bottom is used as output needs two jumpers crossed to the other side’s pins — the principle is simply swapping positive and negative; switch input from the buck-boost output; the buck-boost raises 12V to 24V so the 795 is more brutal and spins faster; not building 24V directly because 12V is smaller, portable use doesn’t need long runtime, and 12V parts are in stock. Output leads out of the box to the motor; lid on; the frame bottom is screwed to a bracket and strong glue fixes the frame to the box base; motor positive and negative connected; job done; test grind works really well and fast, usable for DIY too. 102 comments: this is the way, no argument (7); is a 12V motor enough? why forward / reverse for sharpening? sourcing (2) → every part has detailed sourcing info in the video; where to buy components / is LCSC reliable (2); add a rest to fix the angle (1); an angle grinder takes seconds → too aggressive, the edge quenches; does dry grinding anneal it → no; isn’t a bowl bottom good enough (many); wasn’t this on your livestream → yes; posting at 4 a.m. → afraid of copycats; which 3D printer; the kit is only ¥40-something, don’t rip people off; help fix two streetlight lithium packs.
A repairman’s day: a Soaiy speaker “blamed on me for the battery” misunderstanding (batteries put in wrong, voltage measures fine) → a twist and it plays; a kid’s toy silent when unplugged = dead battery; an old stove with weak water feed gets a steering motor first (nobody tells me it’s unfixable); a camera that won’t charge (alternating red LED: battery or water-damaged board) → a good cell fitted, “overkill”; a Dongcheng kit pack with high-temp fish paper shows voltage, charging at 9W 1.7A, red LED steady
Opening: a customer blames the boss for not fixing a battery problem — “you’ve got me wrong, have a Zhonghua on me” — the Soaiy speaker shows volume as soon as it’s twisted, turns out it just wasn’t charging; Bluetooth / radio modes fine, no mic mode so Bluetooth is right; voltage measures 3.67 vs 0.7… “this battery is fine; just one volt on the other, that’s a big gap, go buy two batteries”. The kid’s thing works plugged in but not unplugged = the battery inside is dead and won’t charge, swap it and OK; the cable burned and was replaced before, the socket is discolored and needs replacing too, hang on. The old stove has run seven or eight years and is hard to fix; weak water feed is a common fault, try a steering motor first, give up if that doesn’t do it; the board is aging; two motors (rotation / water feed), and a bad water motor upsets the steering too; people often fail to fix things, take them apart and bring the pile over. Soaiy follow-up: “you didn’t even put the batteries in right, you’ve got me wrong” — measured voltage for ages, all normal, small screw fitted, done. A camera with no charge and won’t take one: check for charge current, long unused, the alternating red LED flags two faults — battery bad or water in the board; battery seems more likely, it’s fairly new with no water damage; fit a good cell — “give it unlimited learning opportunities; this cell is a bit wasted in there, overkill, an absolutely good cell”. Dongcheng pack: high-temp fish paper for insulation against cell-to-cell shorts, voltage present, LED steady not blinking, charging at 9W 1.7A; red charge LED steady; bye, kid. Comments: please tell us the fault causes and how you test / fix; a noodle machine unused for ages won’t charge, fixable?; a cordless vacuum won’t run; address; honest repairman.
A Biao’s ‘New Year atmosphere machine’ (17 minutes, 4038 likes, MakerWorld / code open-source): scrap steel pipe and rebar welded into an angle-adjustable five-shot firecracker rack with rubber-band auto-feed; voice module (ASR-PRO) → ESP8266 transmitter over WiFi → ESP8266 receiver (700-line config web page) → relay → 24V high-voltage arc igniter; the 24V pack is 6 old salvaged 1500mAh 18650s spot-welded in series (24.63V), the 6S 35A balance BMS needs 26V to activate, CC/CV buck-boost charging at 25.2V, XL4005 stepping down to 5V for the MCU; the transmitter runs on an 18650 + 5V common-port module; live test: ‘fire!’ and it fires in sequence
Opens with ‘Second Battalion Commander, your Italian cannon’. The romance the New Year deserves: walkie-talkie in hand, set off firecrackers remotely by voice, load 5 at a time for burst or single shots; materials are scrap steel pipe and rebar plus a few dozen yuan of electronics; the principle is a WiFi transmitter and receiver controlling ignition. Mechanics: cut pipe and weld a rack, a pivoting joint at the bottom to adjust the angle, a tail so it stands stable; the front support uses old rebar and galvanised pipe, also adjustable; firecracker clip: slot the pipe for the clip bracket, weld a slide on the short end on the other side, weld as many pipes onto the base as shots you want (5), weld nuts at the head and the slide’s tail, cut a fuse groove in the pipe; the clip rides the slide, a rubber band through the screw hole anchors to the base, and after ignition it springs to the next one for automatic feed. Electronics (with shopping screenshots): one 2000mAh 18650 (¥3) powers the walkie-talkie (transmitter) with a 5V charge/discharge module (¥2.85); 6 old salvaged 1500mAh cells make the 24V pack with a 24V 6S balance BMS (NMC 6S common-port 35A with balancing, ¥25.74); a CC/CV adjustable buck-boost module (¥15.3) charges the pack, 5–30V wide input; an XL4005 adjustable buck module (¥5.5) takes 24V → 5V for the MCU; a USB port powers the ESP8266; 2 × ESP8266 (¥13.94), one transmit, one receive; ASR-PRO voice-recognition dev board (¥26.2) + small speaker; 5V relay module (¥2.9) switches the ignition; 24V high-voltage ignition kit (high-frequency transformer, two pins produce an arc). Programming: the voice module uses the vendor’s Chinese block-based tool, wake word ‘Second Battalion Commander’, commands ‘bring up my Italian cannon / fire / open fire / launch / stop / continuous fire / stop continuous fire’, sent over serial to the ESP8266, with synthesised voice generated in the model and flashed; the transmitter ESP8266 in VSCode PlatformIO: opens a hotspot + TCP server, relays the voice serial data, reconnects on drop, 300-odd lines; the receiver connects to the transmitter and handles ignition / auto cut-off / continuous fire, with its own hotspot serving a phone web page for settings (cut-off time etc.), 700-odd lines; flash and test via serial log. 3D-modelled boxes (ignition head, receiver box, transmitter box), open-source on MakerWorld for printing. Assembly: remove the ignition head’s HV leads, pass them through the box and re-solder, lengthen the power lead; the 24V pack is 6 cells in series, 25.2V full, 24.63V on the multimeter after spot welding, wrapped in fish paper, main + and − nickel tabs spot-welded on; balance leads run from the main positive, one per group in order; the balance BMS only takes the negative input and negative output, the positive bypasses the board and goes straight out; plug in the balance leads; the BMS is inactive by default and needs a moment of 26V+ to activate; voltage tests fine, boxed up, snug fit; the buck-boost output set to 25.2V and connected to a parallel pair of leads on the pack; the 24V output feeds the buck module set to 5V; forgot a switch, so cut the lead, extended it and added one; 5V leads to the USB socket; the relay also needs 5V, taken from the 5V buck; the buck-boost output also feeds two 24V leads, positive through the relay to the ignition head; relay 5V + IN signal + 24V in/out extended to the ignition pack, controlled by the ESP8266 high/low level; fit the ESP8266, Type-C power, aviation-connector socket as the charge port; power-up test — charge LED on, the switch wiring doesn’t smoke, manually triggering the relay gives a normal arc, receiver done. Transmitter: the voice module’s two serial wires go to the ESP8266 serial with RX/TX crossed; 18650 + 5V common-port module, nickel tabs spot-welded onto the cell to make soldering easier, then + and − leads soldered on and into the module input, Type-C charging with green flashing for charge and blue for discharge; two Type-C leads with + and − paralleled into one input, plus a switch (one end to 5V +, negative straight through, switch output to the Type-C +); fit the ESP8266, speaker on the lid, voice module, Type-C common-port module; the two Type-C leads feed the voice module and the ESP8266; power-on test, ‘fire!’ OK; lid on, a decorative ‘soul antenna’; phone into the config page to set auto cut-off time / continuous fire; the ignition head is fixed to the rack with an acrylic sheet for insulation, ignition pins glued so the arc lights the fuse; outdoor test, ‘fire!’, fires in sequence, works really well. 257 comments: does this count as manufacturing a firearm (an entertainment toy, not a weapon); I’ve only programmed 8266 with Arduino, can I learn this (absolutely); how to program it (follow the video); a rotary-drum launcher would be perfect (sold online); is it open-source; the pipe has no rifling; won’t the police have a word; are you selling, how much; fireworks are banned.
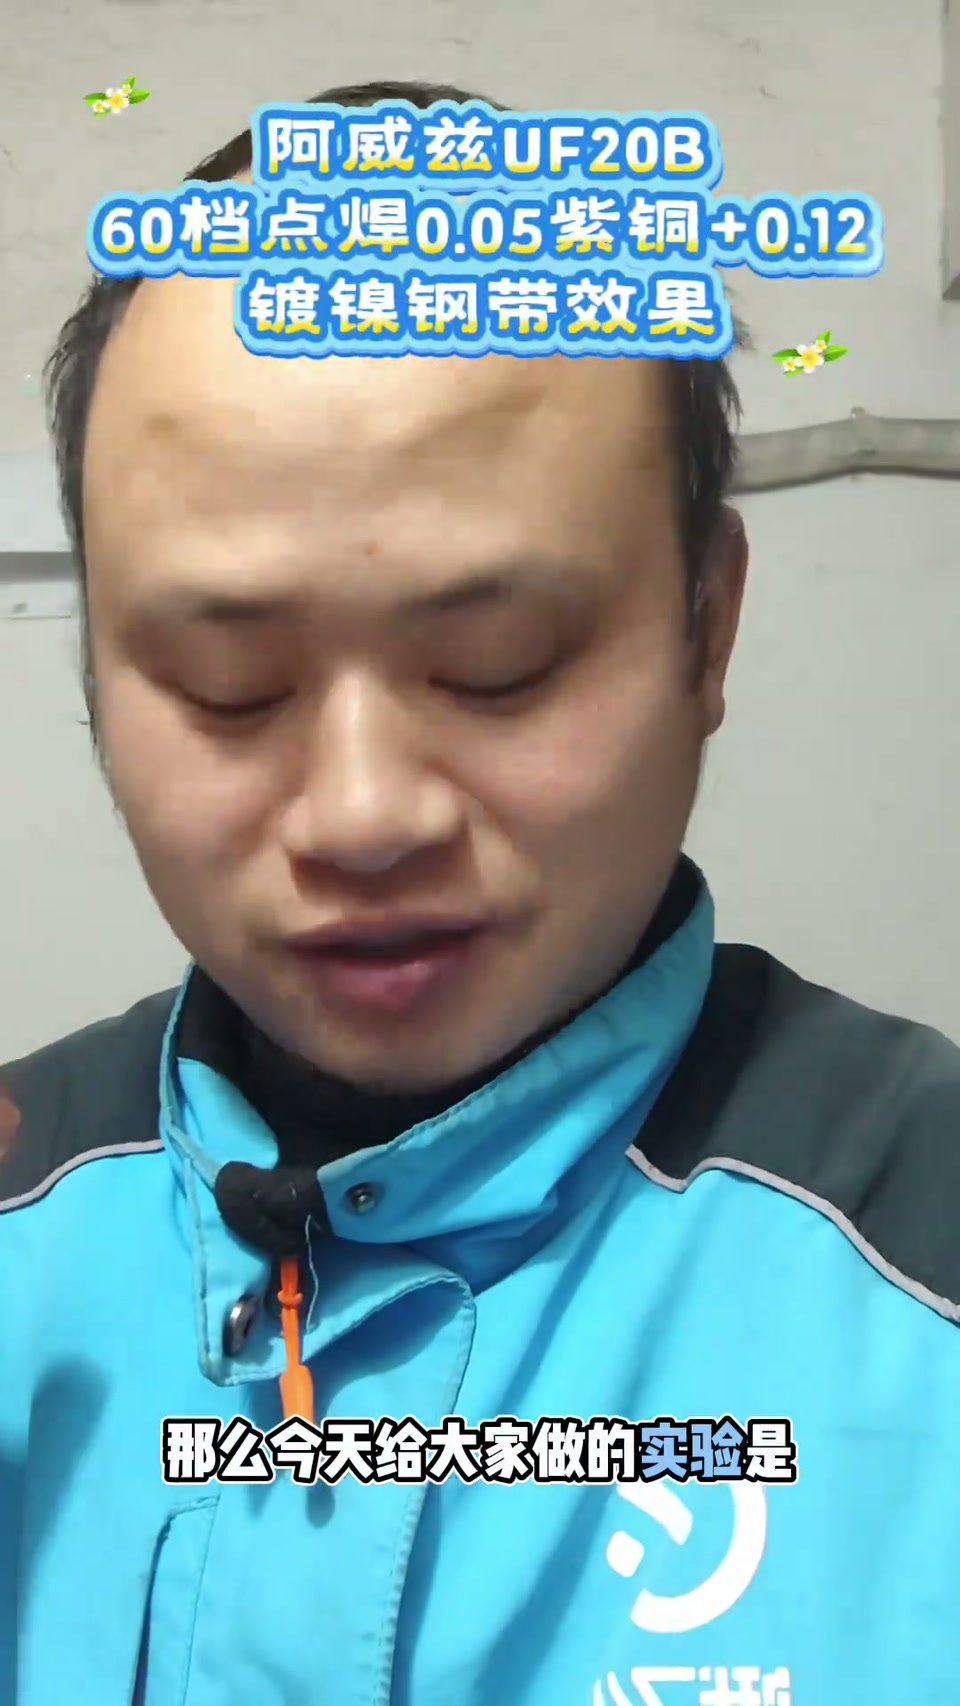
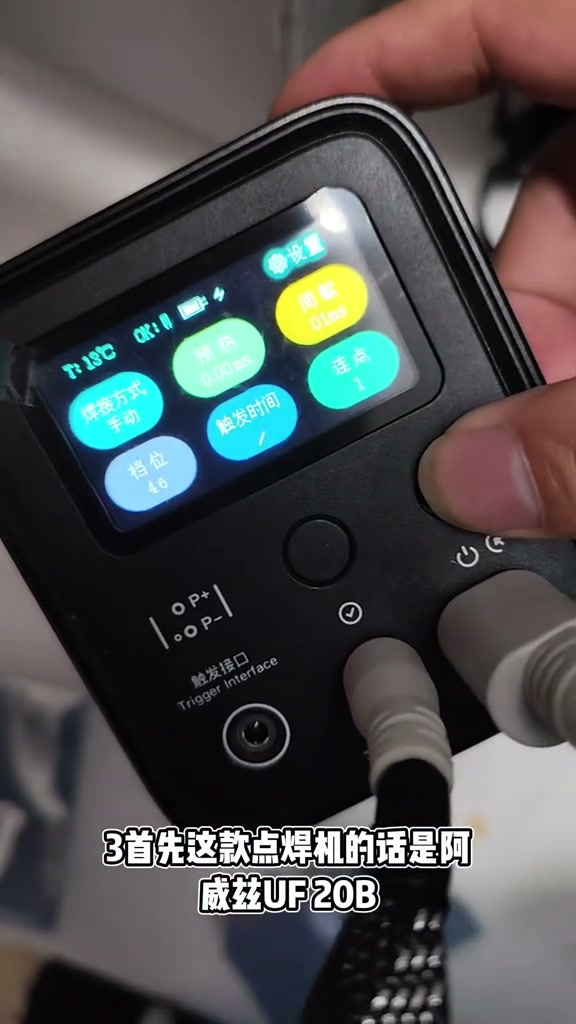
UF20B at gear 60 welding 0.05 copper: on iron it tears two holes out; on a cell negative it’s a bit weak; nickel strip as a base layer recommended
A follower reported that 0.2 copper stacked on 0.2 nickel-plated steel strip wouldn’t weld; the creator says he doesn’t recommend 0.2 copper (very demanding on the machine). With an AWithZ UF20B + upgraded No. 6 welding pen at gear 60 he runs a same-settings comparison: 0.05 copper strip welded to a rusty iron pipe and to the negative of a Jiashikai cell. The welds on iron are blackened (high current), and pulling tears two holes out of the iron; 0.05 copper stacked on 0.12 nickel-plated steel strip on the cell negative peels off leaving two holes, not torn apart. Conclusion: at the same gear 60 the result on iron is clearly much better; use nickel strip as a base layer before welding copper for a stronger joint.
Lefeng’s UF20B (No. 6 pen) gear test at 10/15/20/25 (preheat untouched): on 0.15 nickel-plated steel strip, gear 10 peels off leaving two holes, 15 takes effort, 20 tears the strip, 25 is completely OK and hurts the hand to peel — tearing achieved, no point going higher; answering a fan’s ‘0.15 copper + 0.2 nickel-plated won’t weld’ — first ask whether there is a nickel base layer, doesn’t recommend copper straight on with this unit (copper is hard), stacked-copper and non-upgraded-pen comparisons to follow; the test only speaks for the unit in his shop window
Opens: no addiction to fishing, but addicted to spot welding — a few days without welding and the hands itch. Today testing gears 10/15/20/25; the machine is an AWithZ UF20B with the upgraded No. 6 welding pen; last time was gears 1–5, this time from 10 up in steps of 5, preheat and the rest untouched, only the gear changes, two welds per gear. Gear 10: the 0.15 nickel-plated steel strip peels off, leaving two holes, two holes in the nickel strip too; gear 15: takes some effort, felt it in the hand muscles; gear 20: can already tear the nickel-plated steel strip; gear 25: completely OK, hand hurts from peeling, switch hands; the strip-tearing result is achieved, no need to go higher. A fan says 0.15 copper on 0.2 nickel-plated steel strip won’t weld — I asked whether there was a nickel base layer; with this unit I don’t recommend copper straight on, because copper is fairly hard; a stacked-copper test will be added to the series; the test only speaks for the AWithZ UF20B in my shop window, ones bought elsewhere perform differently, don’t flame me; this is the upgraded No. 6 pen, without the upgrade the result differs too, a non-upgraded-pen test to follow. 37 comments: quit food delivery and go work at a battery factory; why not get a better welder, it’s painful to watch (I also have an AWithZ P60F, it’s enough); can it weld EVE C40 (with a nickel adapter it can); will it work on Gotion copper-terminal 20A (probably not); is the low/high gear difference current or time; what current at the tip on gear 10; 6045 without stacked copper, straight 0.15 nickel-plated OK?; the No. 6 cable’s current doesn’t match a two-capacitor home-built unit.
Repairman Li, ep. 260: a follower sends in a Dyson-style vacuum battery + 6 × 18650 he bought himself (6S); the old nickel is cut leaving the board connections, cells laid + / − and stuck down with double-sided tape, fish paper rings on, AWithZ welder at power 67 sparks too much → 40 is just right, ‘a few extra welds for strength’, main + and − to the board, fish paper insulation, back in with four screws, charge to wake it and it starts; comments: not the original board or it would be locked; no need for rings on the negative
Self-taught repair, ep. 260: a follower brought a vacuum cleaner battery for reassembly, the cells were done and he bought 6 himself. Cut off all the leads and nickel, but not from here — that part stays, there’s no matching part and it still has to be welded again; new cells laid + − + −; they need double-sided tape or they keep shifting, the original had glue too; + and − stuck down; a fish paper ring on every one; cut nickel, one, two, three is enough; ‘soldering iron’ — no, a spot welder, went with the high-power AWithZ and just go hard; power turned up a bit to 67, fine; one weld done, beautiful; he likes a few extra welds so it can’t come loose, two or three would really do; these two are the main − and main +, the rest you weld without thinking; don’t weld those two yet, put it in the case and look first; weld the board legs on directly without removing them; power is a bit high, can’t run it high or it burns through underneath, down to 40 and try again, fine; some welds crooked; weld the remaining + and −; cut the nickel shorter; really, 40 was enough, turned it up too far before, ‘too young, life hasn’t beaten me yet’; at this power the welds are just right, it kept sparking before; assemble, connect the NTC/B2 board and weld; nickel a bit wide, trim; success, beautiful; fish paper insulation, both sides in one go; back in — he took it apart himself and doesn’t know how it goes; + and − leads must not be swapped, swap them and it’s dead, M+ is red; 4 screws; charge to wake it, shows charging; unplug and it starts; a video for the customer, nailed it. 35 comments: always cheerful (6); no need for rings on the negative (3); not the original Dyson board or it would have locked long ago (2); got one backwards again (2); can batteries be posted; how much; how much is the welder; six in series 25V; the insulation is secondary, mostly to hide the mess.
Abiao from the village (an embedded programmer) goes home and fixes appliances for free, vlog (2644 likes): a rice cooker with a loose connection, a hair dryer with burnt switch contacts repaired plus a varistor suggested, a cordless drill’s 5S battery bay re-celled (1500 → 2000mAh with 3C certification, internal resistance 17mΩ and matched, fish paper on, series nickel strips / main + and − / balance leads spot-welded, BMS refitted, red charge light, drill pulls hard), two membrane keyboards merged into one, a hair dryer plug replaced; comments: five cells out of his own pocket, he lost his shirt
An embedded automation programmer goes home and fixes appliances for the village elderly for free. 1) Rice cooker: the light flashing on the repair socket means a loose connection, just push it in firmly; boil water to test the response, water temperature rising from 35°C, heating ring at 100-plus, one done. 2) Hair dryer: no response from the switch, so the switch is suspect; two screws out, it has been opened before and the switch tied with string; multimeter on continuity, the switch pressed shows no continuity; the switch clip is broken, inside is a copper leaf + latch + spring, the two contacts on the copper leaf are burnt, and a diode is wired in for the speed change; no such switch on hand, so the burnt parts of the contacts are cleaned and it goes back, fixed with strong glue instead of string; gear one and two latch fine; the original soldering was sloppy — joints must be solid or they arc, and an arc at the grip is dangerous; suggest a varistor in series across the switch input / output; powered up, back to full health. 3) Cordless drill battery bay won’t charge: odd screws, swap the bit; barely charges and the gauge drops on one press, most likely the cells need replacing; 5S, 21V at full charge; when removing the BMS mind the 4 balance leads; clean off the old nickel, keep the holder; originally 1500mAh each, replaced with 5 new 2000mAh cells with 3C certification; measure every cell’s internal resistance before fitting, this batch all around 17mΩ, fine for a Li-ion drill’s power needs; the original had no fish paper but a ring is best, the 18650 shorts most easily right at that ring; in series order, spot-weld the series nickel strips first, then the main + and − strips, last the balance leads; refit the BMS, tin with the iron and solder the balance-lead nickel strips to the board, connect the main + and − last; check for cold joints; fish paper back on, into the battery bay, screws in; the red charge light is normal, the drill pulls hard. 4) Two membrane keyboards merged into one: swap the cable, note the wire order and numbers, the membrane contacts must line up with the board and be pressed with the clamp bar, cable into its slot, add heat-shrink. 5) Hair dryer plug with one long and one short pin: fit a rice-cooker cord, high power so tin the joints to avoid heating, wrap in tape and heat-shrink. Sign-off: night view of the mountain hollow, ‘maybe I can’t make my hometown rich, but I can contribute a little with what I’ve learned’. 260 comments: five cells out of your own pocket, don’t do this kind of job again (3) → creator: lost my shirt; suggest more close-ups (screws, soldering, multimeter readings) → noted; hold the iron by the grip (proper practice); serving the people, down to earth; that workbench is my dream → I’ll make one.
Repairman Xiao Li ep. 259, vacuum battery swap: a returning fan, bought 4 cells for a few dozen yuan; loose screws suggest the customer tried a sneaky repair; shows 0% but an adjustable supply at 5V charges it; open it up and record the +/− layout (clean first, then photograph); RC3563 tester puts the new cells at 25–26mΩ, about the same as the old 28, 'paid a fortune and the quality's nothing special'; AWithZ spot welder, nickel strip too long so trimmed and insulated, welds 'beautiful'; charged to 60%, starts fine; two machines a day, 'when will I ever get ahead'
Self-taught appliance repair ep. 259, replacing a Li-ion battery for a fan, a returning customer whose machine was repaired a few months ago; bought four cells for a few dozen yuan; take it all apart (forgot how, had to look up the old video); the screws are all really loose as if it's been opened, did the customer try a sneaky repair and fail; plug in to charge: shows 0%, how can it be 0%; try an adjustable supply at 5V and it takes charge, 0.4% and charging, so take it apart; easier with last time's experience; photograph the layout and note the polarity (+ − + −...), clean it first then photograph or you can't see and get it wrong. Not sure of the quality of the cells bought, test with the RC3563 tester: about 25–26mΩ, 'paid nearly ten yuan each and the quality's nothing special, paid a fortune'; pull an original cell and it reads 28mΩ, 'his cells are about the same as mine'. Get the AWithZ spot welder out and weld: this side done, now this side, welds beautiful; the nickel strip is a bit too long and can't be cut, add some insulation; trim the next piece, mustn't be too long; the scissors are no good; a few extra welds, tap it down; very beautiful / number one. Test: customer says it runs under a minute after a full charge; put back together and still 0%, could it be reversed?; charge to 60%, unplug and start, seems fine now; time flies, two machines a day, a battery swapped morning and afternoon, when will I ever get ahead. Comments: sort out your polarity first or you'll blow yourself up mate; apprentice; should the four cells be ¥20 each; I laughed when I saw the resistance test; what spot welder is that.
Master Zhang (Li-ion) builds a 24V30Ah pack for a follower’s electric wheelchair: Jiashikai IFR32140 15Ah LiFePO4 ×16 (8S2P), alternating + / − rows in holders, fish paper on the positive ends, 0.2 nickel-plated steel strip, capacitor spot welder at gear 30, 3 welds per cell = 6 spots, welds checked; 8S LiFePO4 BMS (Bozhi BZ808 30A) with the harness soldered to the tabs in order; shaped flat to fit the battery bay; charge / discharge test; comments: many asking for the welder link / price
Building a 24V Li-ion pack for a follower’s electric wheelchair; single 15Ah LiFePO4 cells, Jiashikai 32140 (label IFR32140-15Ah 3.2V 48Wh; capacity 15.60–15.75Ah, internal resistance <2.5mΩ, voltage 3.293–3.298V). LiFePO4 is 3.65V per cell, so 24V needs 8 in series; 30Ah needs 2 in parallel, 8S2P, 16 cells in total. Laid into the holder alternating + / −; fish paper on the positive ends for insulation; laid out and locked in with the top holder; with the holders on it is very rigid, there is a gap between each cell, good for insulation and safety. Welded with 0.2 thick nickel-plated steel strip; a capacitor spot welder with the current set to 30 welds 0.2 nickel-plated steel strip easily; each cell is welded 3 times, 6 weld spots, so current capacity is assured; after welding every spot is checked for loose welds. Fitting the BMS: a LiFePO4-specific 8S board (Shenzhen Bozhi BZ808-5080-030C30-B-F-8S, 8S 30A LiFePO4, common port, balancing, temperature control); the harness is tidied and soldered in order to the matching tabs; with the BMS on, the 16-cell pack is shaped very flat to suit the battery bay; finally a charge / discharge test. 191 comments: how much for Jiashikai 32140 in 72V45Ah (4); how to build 96V30A for a two-wheeler split into two locations (2); where to buy the welder, want one (1); how much for 12V20Ah (1); how much for 48-30 (1); 3.65 × 8 = 24V (1); OK for a trike (1); is the AWithZ welder any good; welder link please; don’t use this pack on a big delivery e-bike.
Lefeng’s UF20B (No. 6 pen) gears 1–5 series test: preheat 0 / interval 0 / 1ms, 0.1–0.12 nickel-plated steel strip on a Jiashikai negative — gear 1 doesn’t stick at all, 2 sticks a little, 3 a bit tighter but still peels off, 4 a bit hard but still peels, 5 feels like it might stick a little; comments: use gears 10–12 for 21700; a welder costs a few hundred, just buy a new battery (creator: if you want cell performance, there’s no saving money)
Welder series: AWithZ UF20B with the upgraded No. 6 welding pen, trying gears 1–5; preheat 0, interval 0, (trigger) 1 millisecond; two rolls of nickel-plated steel strip, no idea which is 0.1 and which is 0.12, never mind; welding the 0.1 or 0.12 nickel-plated steel strip onto a Jiashikai negative. Gear 1 result: won’t hold; up a gear, gear 2: gear 1 didn’t stick at all, gear 2 sticks a little; gear 3: sticks a bit tighter again but still peels off; gear 4: a bit hard to peel but still comes off; today up to gear 5: this is the upgraded No. 6 pen, 0.1–0.12 thickness on a Jiashikai negative, gear 5 feels like it might stick a little; that’s the show. 11 comments: wanted to hand-build to save money, good grief, a welder costs a few hundred, just buy a new one (creator: if you want cell performance there’s really no saving money); gears 10–12 for 21700; try a 0.3; either go 4 capacitors or 133 mains-frequency; go do deliveries instead of this (no deliveries to do); is 36V at the port normal on a 48V pack when switched off.
Repairman Xiao Li ep. 258, Xiaomi car-washer battery swap (10 minutes): a Xianyu customer supplies 3 × 18650 for swapping; the Xiaomi shell is hard to open, clips snap when prised; old cells read 1.2/0.7/1.8V but resistance 14–16, not actually dead, just need waking up, but the customer bought cells so they get swapped; the new cells' resistance is higher than the old ones', 'useless'; AWithZ welder on 0.15 nickel strip, gear 40→50→70 before he trusted it; the original strips had little tabs that can't be copied, so hammered flat and welded on; wired the polarity wrong (even with photos), a friend pointed it out, rewired to 12.6V and fully charged, 'lucky it was wired to the BMS and not the main unit'
A Hangzhou customer found him on Xianyu, bought three 18650s himself and asked for a swap; thought he'd have taken it apart but he hadn't, 'lost out on that'. Screws out and the Xiaomi shell is still clipped on really tight, the clips won't prise off and snap as soon as you try; more or less got the battery out (XCJ002 MB_26_240311 three-cell pack). Old cells read 1.2/0.7/1.8V; RC3563 tester puts resistance at 14/15/16, 'not actually dead, they just need waking up'; but the customer bought cells, and if you don't swap them he might get ideas, and if the swap doesn't work it's not on me; do the new cells need balancing? new ones are generally fine; the new cells' resistance is higher than the originals', 'useless', but no big problem, fit them anyway. Get the AWithZ soldering iron — no, spot welder — out, gear up to 40; 0.15 nickel strip feels weak so 50; can't tell which gear is right so 70, worried it won't hold so higher still; welds beautiful; each original strip had a little tab soldered to the board, no such tabs here, should have prised the small ones off, without tabs just hammer flat and weld on, 'tell me if I'm doing this right'; feels like the welds are big; weld one corner solid then flip; clean up the pads and board, fish paper along the edge for protection. It was actually fixed, but the cells got wired wrong when connecting (even with photos): drew it out and found the + − + alternation had two negatives together, a friend pointed out that if this side is negative the other can't be negative too; strip and rewire, one side positive one negative, 12.6V now right, fully charged, fixed; lucky it was wired to the BMS, the main unit would have burnt out; from now on take clear photos. Comments: 20mΩ is quite normal for capacity cells; no need to strip it, just wake it with an adjustable supply; why is each cell's voltage different (quite normal); low resistance doesn't mean a good cell, no voltage means it's dead; you're hilarious, greener than me; brute force works miracles.
Two jobs for an appliance repairman: a Dyson vacuum switch the customer bought himself but couldn’t fit (‘is the repair guy all talk?’ — strip, swap, test run, success); a Bluetooth speaker that won’t turn on — prying the battery is the easiest way to start a fire, swap in a new cell, spot weld, tape it, it has power, fill with glue, charging wattage comes up, perfect repair
Job one: the customer brings a Dyson vacuum and a switch part he bought himself at home but couldn’t fit — ‘I reckon the repair guy is all talk’ — let’s see today whether he is; take it out, fit a new one, test run, installed, perfect repair. Job two: a speaker that won’t turn on, open it and see what’s wrong: prying like this is the easiest way to set the battery on fire (a warning); grab a new cell, spot weld it; a bit of tape; it has power, OK, see if it plays; fill it up with glue for the customer, a bit more glue; watch the charging current — the wattage comes up, OK; charging; the little heart-shaped color-light speaker with a screen, perfect repair. Comments: the most refined man on Douyin (creator liked it); if you were nearby I’d bring my pressure cooker; should the Dyson be opened and blown out; post your address (creator: you can find it here too); can you come fix a water heater (yes, happy to take that off your hands); can you fix charging shoes.
Stair-climber 54.6V Li-ion pack (label says 72A model, <25A) has lost capacity: inside are 18650 2000mAh cells in 5P for only 10Ah, several years old, worthless; rebuilt to the largest size the outer case allows as 13S8P EVE 18650 2500mAh = 20Ah: fish paper on the positives, alternating + / − layout, epoxy board between series groups, 0.2 nickel strip welded, strapping tape, JBD 13S 30A common-port BMS (check the balance-lead order after soldering so you don’t burn the board), charge/discharge test
A stair-climber-specific Li-ion pack; the label reads model 72A, working voltage 39–54.6V, working current <25A, charge 54.6V, no indoor charging; whether 72A is a capacity or a model number is unclear — it doesn’t look that big; the owner says the capacity has faded and it runs out quickly. Cells removed: 18650 at 2000mAh each, 5P for only 10Ah total — not enough, and after several years the fade is severe, completely worthless. Rebuild to the largest size the outer case can take: brand-new EVE 18650 2500mAh, fish paper on every positive for insulation; lay them out to the case’s maximum usable size, 13 series × 8 parallel, 20Ah in total; alternate + / −, with an epoxy board between each series group for insulation; weld with 0.2-thick nickel strip, joining the single cells into one block in parallel and series; once welded, wrap in strapping tape so nothing works loose; fit the BMS (JBD 13S 30A common-port), chosen by cell type, series count and current; after soldering the balance leads, measure the lead order so a mistake doesn’t burn out the BMS; solder the + and − leads; charge/discharge test, and if all is well it’s done. Comments: do you need an electrician’s licence for this? Is this discharge through the BMS but not charge?; requests for a build, phone number, price.
Lefeng rambles: no interest in anything except the spot welder (charges fast, 20 gears, welds whatever); replies to a follower whose “same model” can’t weld 0.2 nickel + 0.15 copper — that one was bought on Xianyu; his own storefront unit, tested himself: 0.15 nickel-plated base + 0.1 copper + 0.15 nickel-plated, or 0.1 base + 0.15 copper + 0.1, both fine; a single bridge of 0.15 nickel + 0.15 copper with a slightly thinner top layer also works; needs the No. 6 welding pen upgrade; don’t ask me about units bought elsewhere
Opens musing that he wants nothing; the only thing he still enjoys is coming back to mess with this pile of stuff — the spot welder charges fast, full in no time, 20 gears. A follower earlier asked why the same spot welder couldn’t weld 0.2 nickel strip plus 0.15 copper; turned out it wasn’t bought from the storefront but on Xianyu; told him to swap either the 0.2 nickel strip or the 0.15 copper. The one in my storefront I verified myself: 0.15 nickel-plated steel strip as the base, 0.1 copper strip stacked in the middle, another 0.15 nickel-plated steel strip on top, no problem; a follower used 0.1 nickel-plated as the base, 0.15 copper stacked, 0.1 nickel-plated on top, also no problem; I myself, on a single bridge, 0.15 nickel strip base + 0.15 copper sheet, with the top layer slightly thinner, also no problem. I’m not asking you to buy from my storefront, but the data I tested is only for the storefront unit; if you buy it and it doesn’t deliver, come and yell at me (you do have to upgrade to the No. 6 welding pen); don’t ask me about the settings of units bought elsewhere, I don’t know. I just like doing a couple of welds when I’m idle, I like welding, not sure whether that’s a weird fetish. Comments: this welder is good, 0.15 copper stacked on 0.15 nickel-plated on a 21700 no problem, haven’t tried Jiashikai; careful, your little wife will grab you by the ear.
Lefeng answers ‘support says the UF20B can weld copper directly (with flux)’: two Jiashikai cells in parallel make a 30000mAh LiFePO4 power bank (new board ¥20-odd), 0.1 copper + 0.1/0.12 nickel-plated straight on — gear 70 spots look pretty but drop off with a tug, gear 90 four spots still not solid; switch to a 0.15 nickel-plated base, gear 30 already solid, 40 tears, 60 can’t be pulled, ‘don’t recommend copper straight on with this model’; B1/B− to the board, sealed with epoxy board + glue, like a single big cell super-fast-charging power bank
A follower asked whether the UF20B can weld copper stacked directly, I said no, he said support says it can with flux, so here’s the video, see for yourself. The four Jiashikai cells torn down last time (the leaky group out of the 15S is discarded), BMS and charge module not removed, bought a new LiFePO4 board with more ports; two Jiashikai in parallel for a power bank, 30,000 mAh; into the holder in parallel, 3.2V output, spot weld + to + and − to −; many previous copper-and-nickel weld marks on top; switch on the UF20B, charges quickly, try to charge it full before welding; copper 0.1, nickel 0.12 (maybe 0.1, no more than 0.12); added a braided sleeve to the lead himself, No. 6 lead; preheat 10, (interval) 20; straight on first: 0.1 copper + 0.1/0.12 nickel-plated, gear 40 → 70 (dangerous, don’t imitate, same unit as in the showcase): spots are OK but a tug shows they’re not solid, ‘so I don’t recommend copper straight on’; up to gear 90 with four spots, pretty spots but still not solid, don’t recommend stacking copper directly on this model. Next, nickel base: 0.15 nickel-plated steel strip as the base, with experience gear 30 is already very solid (a bit dark, current is high); 0.15 strip at gear 40 tears; up to gear 60 blows two holes; then 0.1 copper on the base: can’t be pulled, can’t be pulled off, clearly far more solid than straight onto the cell; with this model a nickel base works, straight on is not recommended, a thinner strip might stack. After welding, main + / − soldered to B+/B−, an epoxy board sealed on top and glue poured everywhere else; the power bank works, 93% charge; case closed, OK; the two Jiashikai cells sit inside like a single big cell, fast charge, charge board ¥20-odd, wrap with tape; 30,000 mAh, more than enough for food delivery. 68 comments: cells can’t be torn down over and over, three times and they’re basically done; music too loud; will a single layer of 0.3 nickel do; 0.15 copper under, 0.2 nickel-plated on top, weld directly?; can this machine do a 0.2 nickel base; pure nickel costs more than copper strip and doesn’t spark; only this episode showed me copper straight on isn’t stable; 32140 1P16S without a BMS?
Abiao builds color-changing night lights for his students (2222 likes): one 2000mAh 18650 + charge-management module (Type-C, 4.2V charge, 5V output) + switch + 0.01A color-changing LED, runs a month; nickel strip welded to +/− and folded flat, tape to secure; modeled and 3D-printed shells, three sets in 4 hours; given to the best students in the last maker class of the term; comments: no BMS, aren’t you afraid the kids blow it up? link for the LED?
Somehow ended up making a few fun color-changing night lights / mood lights as a gift for the students who took a term of the science maker extension class — a little present for the last lesson, tied to what we covered. Simple parts: a cell, a charge-management module, a switch and a color-changing LED bead; the LED draws only 0.01A, so one 2000mAh 18650 keeps it lit for a month; the goals were long runtime, fun color changing, durable, rechargeable, simple and cheap to make. Build: nickel strip is already welded to the cell’s +/−; fold the strip over so it doesn’t stick out, and a wrap of tape around the outside makes it more secure; the cell’s +/− go to the charge-management module, charged over a Type-C cable, the module charges the cell at 4.2V; the module’s 5V output goes to the +/− leads; the LED negative goes straight to the output lead, the switch sits on the positive side; test lit fine, decent brightness; loose parts look untidy, so model a shell, one print run of three sets takes over 4 hours; the two halves fit together seamlessly; three done (short on time). Over hills and around eighteen bends to the school; in class every student gets hands-on, small hands not yet skilled but earnest, helping each other, completing the circuit together and lighting their first light-controlled lamp; maybe one day this light will shine among the stars; the lights he made go to the best students; applause closes the last lesson. Comments (143): where to buy such a low-power LED, link? (5); Biao, when’s the next spot-welder sponsorship (why?); a cell must have a BMS, safety first / no BMS, aren’t you afraid the kids get blown up (creator replied); the charging port sits too low to plug in easily; a white shell would diffuse the light better; what brand of multimeter (ALIENTEK); how’s the welder / how much.
Youzi Teardown (Chinese/English subtitles) builds a 5S Samsung 40T 21700 pack in a Dayi A3 pin-terminal kit with the AWithZ UK1 (nameplate 5V/2.4A in, 8.4V/1380A MAX, adjustable mode / gear / trigger / continuous, the pen only welds when its switch is pressed): cells go in by the holder to locate main − and main +, a small nickel piece joins the main − first, flip over for the main +, gauge red to L+ and black to L−, fit the spring and lid with four screws, test on an A3 tool
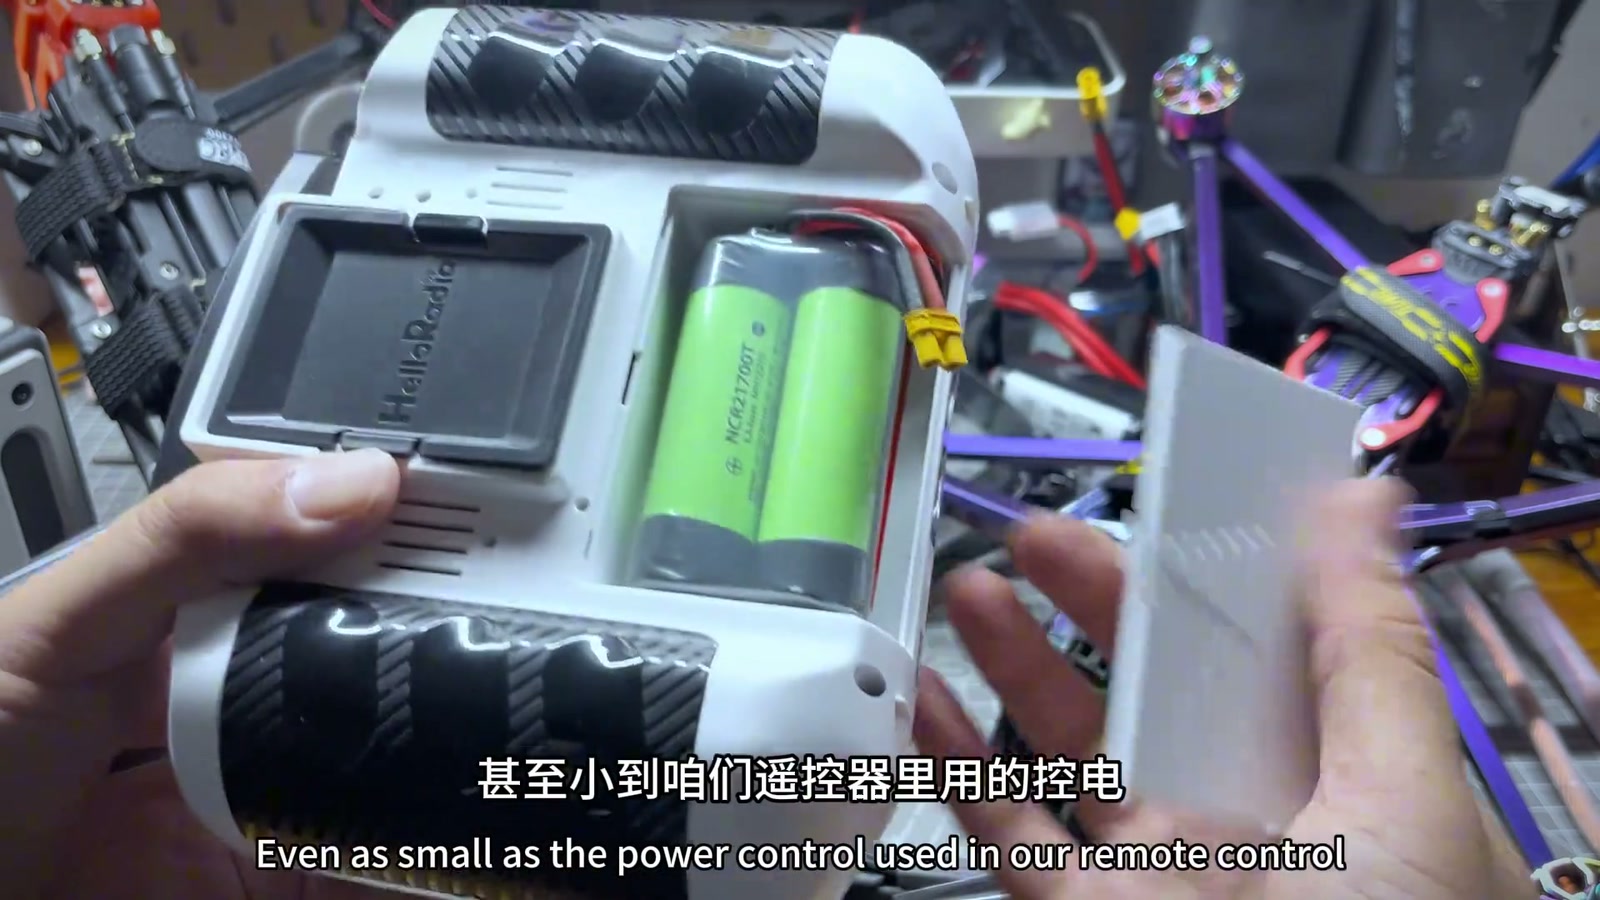
Building a 21700 five-series pack with Samsung 40T cells (INR21700-40T); the welder is an AWithZ UK1, 5V (2.4A) input, 8.4V output voltage, 1380A current, Shenzhen Juequi Technology; on power-up it has adjustable mode, gear, trigger and continuous; its pen doesn’t weld the moment it touches, you also have to press a switch — he’ll show that when welding. The kit is a Dayi A3 pin-terminal one, open it, there’s nickel inside, tip it out. How the cells go: the bent part faces this way, this is the main −, so the negative goes on this side; once in, locate the main − and main +, this is positive; join the main − first, the small nickel piece goes here; unlike the previous pen that welds as soon as it touches, this one only starts when the switch is pressed, very convenient; the large nickel goes on; flip it over, weld the main + first, then put it in; this pack is now connected. Gauge: by the way the case sits, the gauge goes at the back, red to L+, black to L−; set it in; pack welded, lid on, there’s a spring that must go in or the button won’t come back up, four screws in; find an A3 tool and try it; have you learned to weld a pack now? 159 comments: where to buy brand-new genuine cells, JD / Taobao / Pinduoduo are full of fakes (3); are 5 × 4.0 reliable, EVE 40P for about ¥100 (2); how much is the welder; tabless vs Sony C6; which welder for copper shims.
Ran into a problem? Have an idea for improvement? Tell us. We read every piece of feedback carefully. Valid feedback earns points, redeemable for accessories / coupons.
Thanks for your feedback!
We'll review it within 1–5 business days. If you left an email, valid feedback earns points redeemable for accessories / coupons. If we need to follow up, we'll contact you at the email you left.
WeldWorld is an open platform for user sharing; content does not represent official advice.
Improper battery handling can cause fire, explosion, chemical burns and serious injury. Read the full AWithZ Safety & Usage Guidelines before any lithium battery assembly, spot welding or testing, and before using the community.
Community content is personal experience, not verified by AWithZ; where it conflicts with official documents, the official documents prevail.
Never apply someone else's settings directly; always start at a low level and test on scrap.
Before copying any procedure, go through the self-check list in Part 3 of the guidelines.

 LV3
LV3

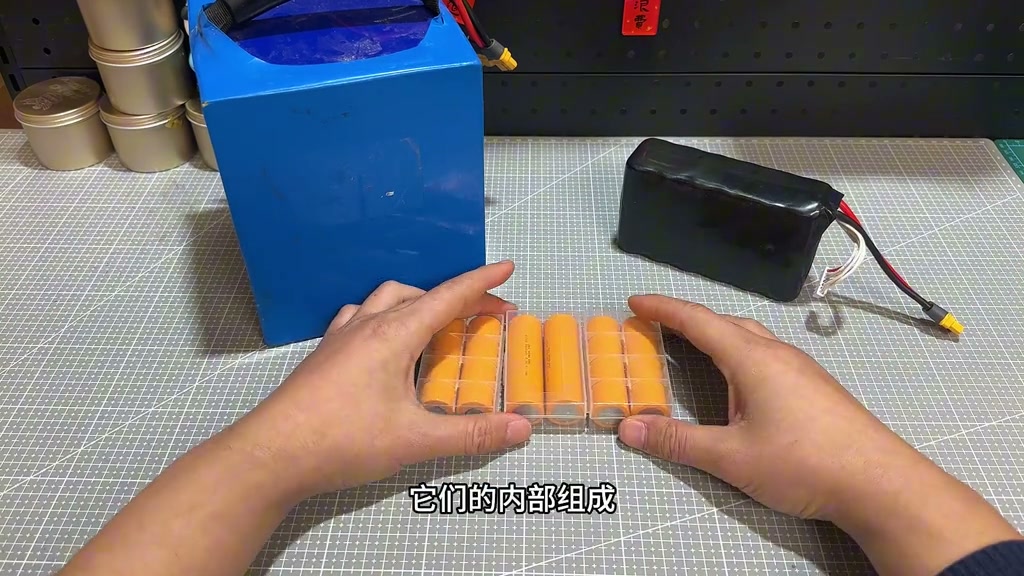
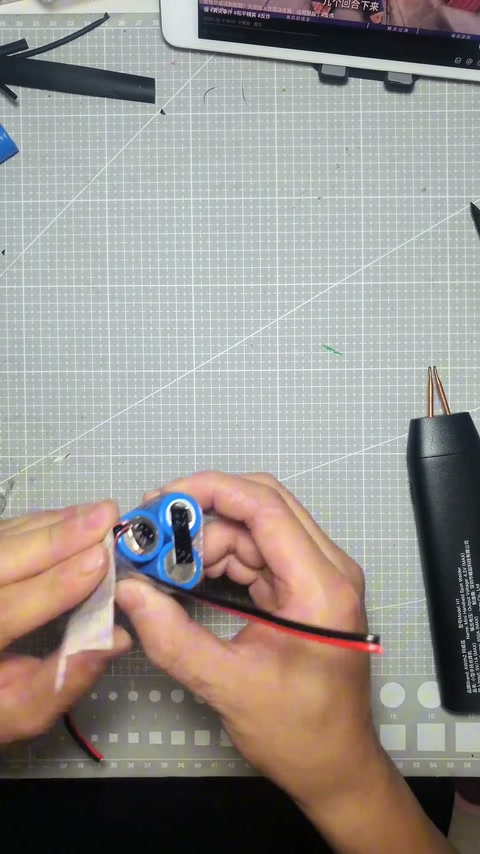
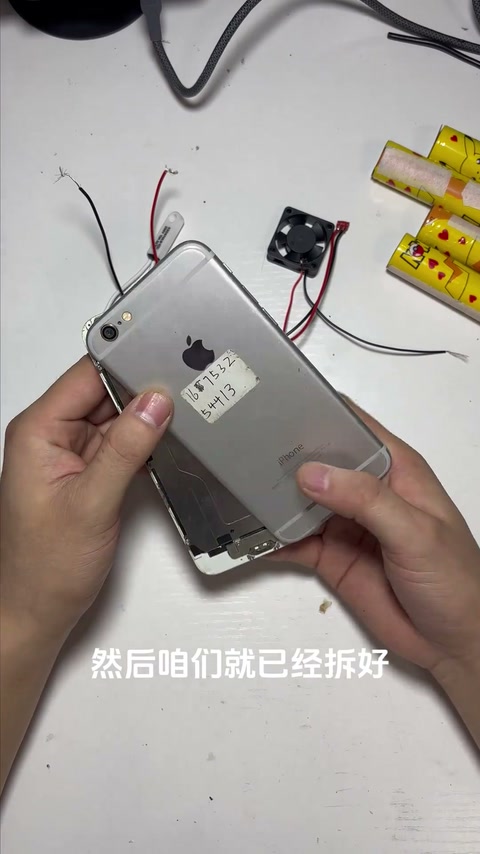
 Ep. 37 | Batteries? I can’t repair them, but I can build themProjectsBlindFix
 LV5
LV5
 LV3
LV3



 LV1
LV1

 LV1
LV1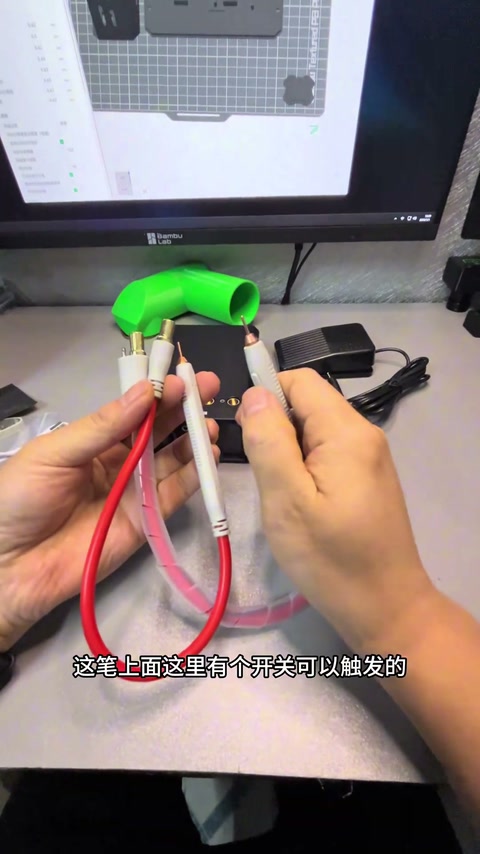




 LV2
LV2



 LV1
LV1

 LV2
LV2


 LV3
LV3
 LV5
LV5


 LV1
LV1


 LV5
LV5






 LV5
LV5



 LV5
LV5