Build your own portable knife-sharpening gadget that every home needs? Kitchen knife gone blunt? Build a portable belt grinder on the cheap and never worry about a dull knife again





Creator’s own settings as stated in the video (timestamps link to the moment). Not official values — test on scrap first.
Bill of materials
Welder, accessories, consumables and parts used in this build; quantities and specs are editable Download BOMDescription
Abiao from the village DIYs a portable rechargeable belt grinder for knives (903 likes): belt-grinder head kit ¥44 + 795 motor ¥28.9, a heat-shrunk bushing to fit the shaft, 3D-modeled and printed base / housing / motor bracket (promised open source); battery 9 × 18650 2000mAh 5C (¥3 each) in 3S3P 12.6V 6000mAh, nickel tabs spot-welded in a “box” pattern for the parallel / series joins so the balance board works, fish paper on, 3S 60A separate-port balance BMS ¥6.1, Type-C charging module ¥11.8, battery meter ¥10.9, latching lit button ¥6.9, 6-pin rocker switch for forward / reverse, ¥15.3 buck-boost stepped up to 24V to make the 795 more brutal; total cost ¥100-something; sharpens well; comments: isn’t the bottom of a bowl good enough, add a rest to fix the angle, does dry grinding anneal the edge (no)
The kitchen knife is blunt; experts use a whetstone, I’m a novice, so build a portable rechargeable belt grinder: forward / reverse adjustable, charge display, a neat power switch, stepless like a gas pedal; kitchen knives and machetes come up sharp with a quick pass, belts are swappable, one minute and it cuts vegetables like tofu; cost ¥100-something. Core parts: belt-grinder head kit ¥44 (comes with 5 belts, drive wheel / idler); 795 motor ¥28.9 (with mount and dust cover, 200W). Assembly problems: the motor shaft is smaller than the drive-wheel bore, so buy 5mm ID / 8mm OD bushings (¥19.5 for 5), heat the drive wheel so it expands and drop the bushing in, then lock the grub screw to clamp the motor shaft; the frame holes don’t line up with the motor holes and can’t be drilled (the original design wasn’t for a 775/795), so he models a base and housing (with battery bay and slots for the electronics) plus a motor bracket, 3D prints them, and will release the models free and open source; two screws hold the bracket to the motor, the other side to the steel frame, drive wheel fitted; changing a belt means removing the idler; a quick power-up to fine-tune the idler until it runs smooth. Battery: for portability, 18650 2000mAh 5C-discharge at ¥3 each, 9 cells for 12V (3S3P, 12.6V 6000mAh); battery meter DC7-100V ¥10.9; forward / reverse via a KCD1 6-pin 3-position rocker switch, ¥13 for 10; Type-C 3S charge-management module ¥11.8. Spot-weld the nickel tabs on; note the parallel / series joins are welded in a “box” pattern so the balance BMS actually works, otherwise it only balances one group; wrap in fish paper for insulation and heat isolation; fit the 3S 60A 12.6V balance BMS (¥6.1) — separate-port, so both input and output leads must be connected; pack goes into the printed box, input side to the Type-C charging module, plug in and it charges normally. Fit the lit metal latching button ¥6.9: switch input to the pack’s output positive; button negative and meter negative twisted into one lead; meter positive, sense lead, switch output and switch positive twisted into one lead; the negative lead to the pack’s output negative; into the input of the adjustable buck-boost module ¥15.3, then the master switch; the light comes on, so the wiring is OK. Forward / reverse rocker switch: the middle pins are the power input, and whichever of top or bottom is used as output needs two jumpers crossed to the other side’s pins — the principle is simply swapping positive and negative; switch input from the buck-boost output; the buck-boost raises 12V to 24V so the 795 is more brutal and spins faster; not building 24V directly because 12V is smaller, portable use doesn’t need long runtime, and 12V parts are in stock. Output leads out of the box to the motor; lid on; the frame bottom is screwed to a bracket and strong glue fixes the frame to the box base; motor positive and negative connected; job done; test grind works really well and fast, usable for DIY too. 102 comments: this is the way, no argument (7); is a 12V motor enough? why forward / reverse for sharpening? sourcing (2) → every part has detailed sourcing info in the video; where to buy components / is LCSC reliable (2); add a rest to fix the angle (1); an angle grinder takes seconds → too aggressive, the edge quenches; does dry grinding anneal it → no; isn’t a bowl bottom good enough (many); wasn’t this on your livestream → yes; posting at 4 a.m. → afraid of copycats; which 3D printer; the kit is only ¥40-something, don’t rip people off; help fix two streetlight lithium packs.
Outcome
| Goal | DIY a portable rechargeable belt grinder for knives |
| Build | Belt-grinder head + 795 motor + 3S3P 18650 + 3S 60A board + buck-boost to 24V + 3D-printed housing |
| Result | Finished, sharpens well · verified on camera: 23–45s and 482–509s sharpening and vegetable-cutting demos |
Steps11 steps · click a frame to jump
 1. The finished piece: rechargeable portable belt grinder, forward / reverse, charge display, button; sharpens in 1 minute; cost ¥100-something
Experts use a whetstone, I’m a novice; portable rechargeable belt grinder, forward / reverse adjustable, charge display, a neat gas-pedal-style power switch; kitchen knives and machetes come up sharp with a pass, belts swappable; a minute and it cuts vegetables like tofu; cost about ¥100-something.
00:00 – 00:52 2. Core parts: belt-grinder head kit ¥44 (5 belts included); 795 motor ¥28.9; fit the drive wheel and idler
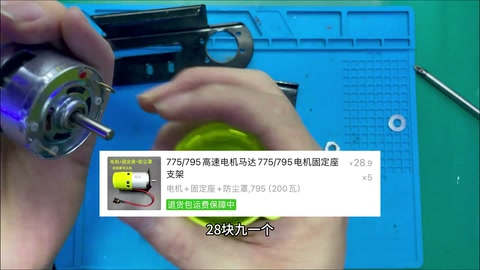
Belt-grinder head kit ¥44, the kit includes 5 belts; 795 motor (with mount and dust cover) ¥28.9; the kit needs assembling yourself — fit the idler and drive wheel and mount them on the frame.
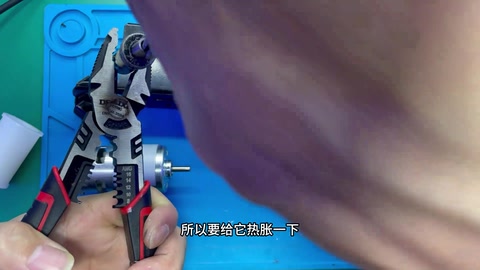
00:52 – 01:14 3. Bore too big: buy 5mm ID / 8mm OD bushings, heat the drive wheel to expand it and press in, lock the grub screw
The motor shaft is smaller than the drive-wheel bore; bought bushings (¥19.5 for 5, 5mm ID / 8mm OD) matching the bore, heated the wheel so it expands and dropped the bushing in; once in, the bore shrinks to match the motor shaft; lock the grub screw so the bushing is clamped and clamps the shaft in turn.
01:14 – 01:50 4. Frame holes don’t line up: 3D-model the base / housing / motor bracket (open source), print and fit
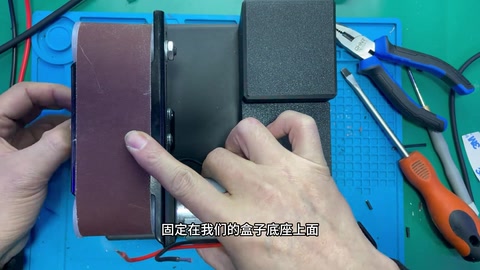
The steel frame’s holes don’t match the motor’s and can’t be drilled (the hollow in the middle is too big), the original design wasn’t for a 775/795; model a base and housing with a battery bay and slots for the electronics, models released free and open source; the key part is the motor bracket; 3D print; two screws hold it to the motor, the other side to the steel frame, drive wheel fitted.
01:50 – 02:37 5. Remove the idler to change belts; brief power-up to fine-tune the idler until smooth; connect the motor’s positive / negative leads
Each belt change means removing the idler, fitting the belt and locking it again; a brief power-up to test, fine-tuning the idler position until it spins smoothly; two positive / negative input leads soldered to the motor.
02:37 – 03:01 6. Electronics: 18650 2000mAh 5C ¥3 × 9 for 12V; meter ¥10.9; 6-pin rocker for forward / reverse ¥13 per 10; Type-C 3S charging module ¥11.8; 3S3P = 12.6V 6000mAh
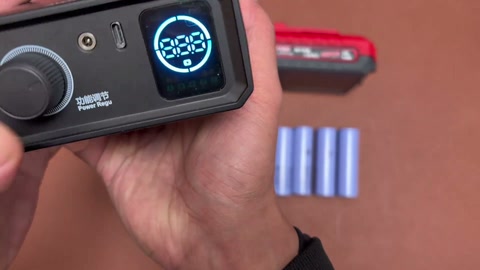
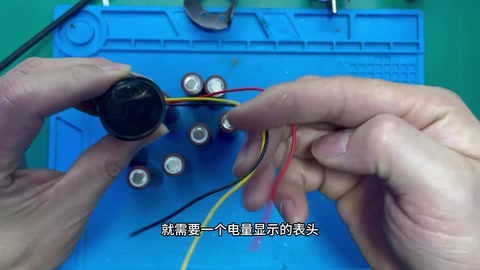
For portability, battery of 18650 2000mAh 5C-discharge at ¥3 each, 9 cells for 12V; battery meter DC7-100V ¥10.9; forward / reverse via a KCD1 6-pin 3-position rocker switch, ¥13 for 10; Type-C charge-management module ¥11.8; 9 × 18650 in three series, three parallel, 12.6V 6000mAh.
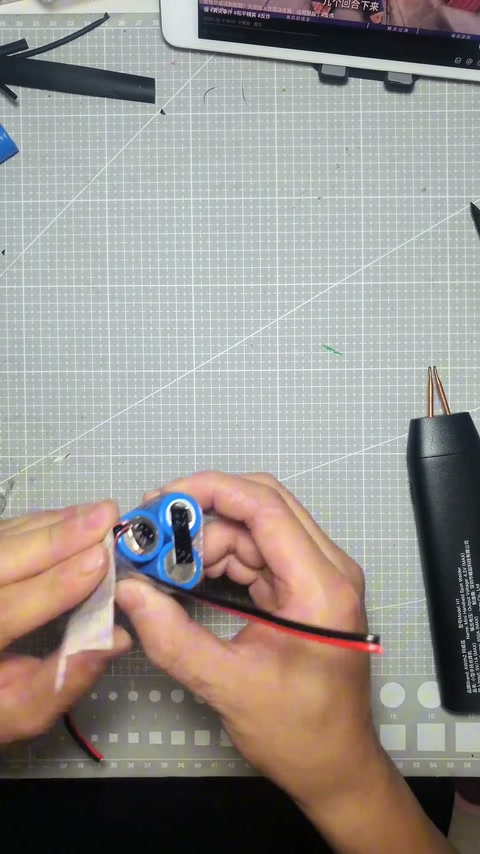
03:01 – 03:52 7. Spot-weld the nickel tabs (UK1); “box” pattern for the parallel / series joins so the balance board works; wrap in fish paper
Spot-weld the nickel tabs on; note the parallel / series joins are welded in a box pattern so the balance BMS actually works, otherwise it can only balance one group; wrap in fish paper for insulation and heat isolation.
03:52 – 04:32 8. 3S 60A 12.6V balance board ¥6.1, separate-port with input and output wired; into the box; input to the Type-C charging module, charges normally
Fit the 3S 60A BMS (12.6V balancing, ¥6.1); separate-port, so both input and output leads must be connected; pack goes into the printed box; input side to the Type-C charge-management module, plug in and it charges normally; into the box.
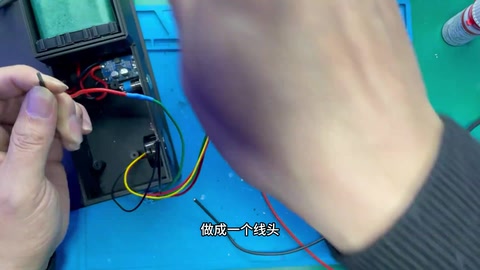
04:32 – 05:12 9. Lit metal latching button ¥6.9; meter / switch leads bundled; into the buck-boost module ¥15.3; light on = wiring OK
Lit metal latching button ¥6.9, input to the pack’s output positive; button negative and meter negative twisted into one lead; meter positive, sense lead, switch output and switch positive twisted into one lead; the negative lead to the pack’s output negative; both leads into the adjustable buck-boost module (¥15.3) input, then the master switch; flip the switch and the light comes on, so the wiring is fine.
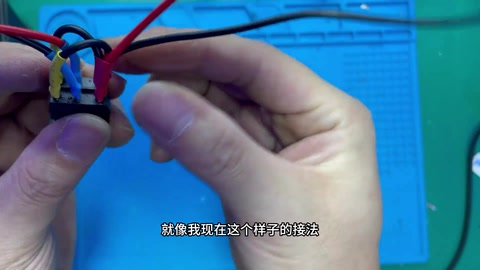
05:12 – 06:09 10. Forward / reverse rocker: middle is input, two crossed jumpers on the output side = polarity swap; fed from the buck-boost output; 12V up to 24V makes the 795 more brutal; why not 24V outright
On the rocker switch the middle pins are the positive / negative input, and whichever of top or bottom serves as output needs two jumpers crossed to the other side’s pins — the principle is swapping positive and negative; switch input from the buck-boost output; the buck-boost lifts 12V to 24V so the 795 puts out more brutal power and higher rpm; no 24V pack because 12V is compact, portable use doesn’t need long runtime, and 12V pack parts are in stock (Type-C module, balance board); two output leads out of the box to the motor; lid on.
06:09 – 07:28 11. Frame bottom screwed to a bracket, strong glue to the base, motor connected; test grind works well
A bracket at the bottom of the grinder frame is screwed on; strong glue fixes the frame to the box base; output positive / negative from the box to the motor input; job done; test grind — works really well, fast, usable for DIY too.
07:28 – 08:45
Bill of materials
| Belt-grinder head kit 50×350 ×1 | 5 belts included · Sharpening body |
| 795 motor + mount + dust cover ×1 | 200W,12–26V · Drive |
| Bushings ×1 | 5mm ID / 8mm OD, pack of 5 · Shaft fit |
| 3D-printed base / housing / bracket ×1 | Self-modeled, open source · Structure |
| 18650 2000mAh 5C ×9 | ¥3 each · 3S3P |
| 3S 60A balance BMS ×1 | Separate-port · Protection and balancing |
| Type-C 3S charge-management module ×1 | Charging |
| Battery meter DC7-100V ×1 | Charge display |
| KCD1 6-pin 3-position rocker switch ×1 | Pack of 10 · Forward / reverse |
| Lit metal latching button 12mm ×1 | Power switch |
| Adjustable buck-boost module ×1 | 12→24V · Step-up |
| UK1 welder / fish paper / strong glue | Pack build and fixing |
Creator’s tips
- Weld the parallel / series nickel tabs in a “box” pattern so the balance board acts on every parallel group 04:18
- A separate-port balance BMS needs both input and output leads connected 04:45
- For an oversized bore use a bushing + heat-expansion fit, then lock the grub screw 01:20
- Rocker-switch forward / reverse: middle is input, two crossed jumpers on the output side 06:13
- A small pack + buck-boost to 24V gives portability and power at once 06:45
Pitfalls
- The belt-grinder frame isn’t drilled for a 775/795; a bracket has to be made 01:52
- Comments: an angle grinder is too aggressive and quenches the edge; does dry grinding anneal it (creator says no)
- Comment: the kit is only ¥40-something, don’t rip people off
Li-ion safety
- “Professional operation, non-professionals do not imitate” corner badge 04:08
Quotes
Cost & time
| Belt-grinder head kit | ¥44 |
| 795 motor set | ¥28.9 |
| 18650 ×9 | ¥27 · ¥3 each |
| Bushings ×5 | ¥19.5 |
| Buck-boost module | ¥15.3 |
| Type-C charging module | ¥11.8 |
| Battery meter | ¥10.9 |
| Latching button | ¥6.9 |
| 3S 60A BMS | ¥6.1 |
| Rocker switches ×10 | ¥13 |
| Total | ¥160 |