
Second version of my low-cost DIY soldering iron: upgraded to Li-ion power plus a printed shell, more convenient to use



Creator’s own settings as stated in the video (timestamps link to the moment). Not official values — test on scrap first.
Bill of materials
Welder, accessories, consumables and parts used in this build; quantities and specs are editable Download BOMDescription
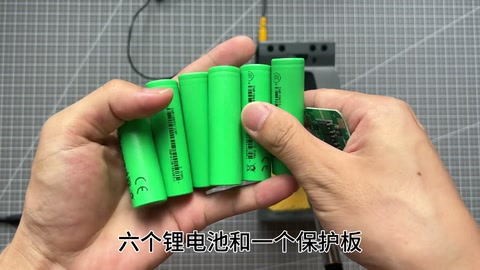
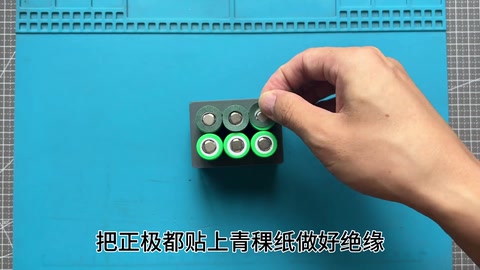
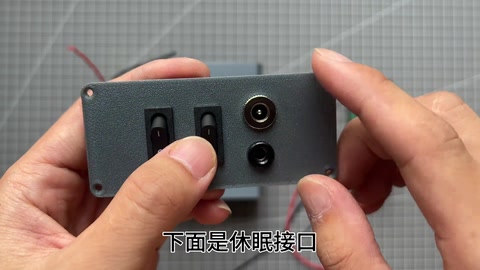
Home-built soldering station, version 2: 6 Li-ion cells + BMS + 3D-printed shell; fish paper on the positive ends, cells laid out to the BMS wiring, welded with the AWithZ supercapacitor spot welder at gear 10 using the manual-button pen, balance leads and power leads soldered on; twin switches (battery / main board), external-power charging port, sleep connector, assembled and test-soldered
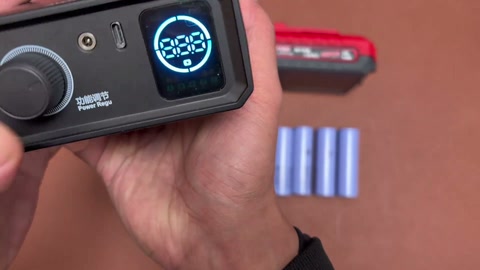
Lots of people in the comments showed their own home-built soldering irons, so the creator upgrades his earlier DIY soldering station: materials are 6 Li-ion cells, 1 BMS, and a self-designed 3D-printed shell (came out well). Battery welding: fish paper on the positive ends for insulation, cells positioned to match the BMS wiring; welded with the AWithZ supercapacitor spot welder at gear 10, the pen with the manual button is convenient; weld the cells, the BMS balance leads and the power leads in turn, then insulate the battery. Main unit assembly: on the rear panel the left switch controls the battery and the right switch the main board, external power and charging port on top, sleep connector below; fit the main board with four screws, secure the battery and wire it as required, mind the polarity; fit the rear panel and it’s done, the outside fits together seamlessly; plug in the handle and the sleep socket, switch on the battery and the main board, and solder a board to test. Comments: one viewer reports an AWithZ that ‘starved’ twice after sitting for half a year — the first time it revived after a day and night on charge, the second time it didn’t after 36 hours and went back to the factory; don’t buy the big-capacitor type if you rarely use it (creator: didn’t know that could happen); T12 mod enthusiasts; some find the accessories over-complicated, simplicity is best.
Outcome
| Goal | DIY soldering station v2: Li-ion powered + 3D-printed shell |
| Build | 6 Li-ion cells + BMS + 3D shell + main control board |
| Result | Assembled successfully, test-soldered a board · verified on camera: Power-on test at 54–64s, temperature display, soldering a board |
Steps5 steps · click a frame to jump
 1. Upgrade materials: 6 Li-ion cells, BMS, 3D-printed shell
People in the comments showed their home-built irons; upgrading the earlier DIY station; materials are 6 Li-ion cells + BMS + a self-designed 3D-printed shell, which came out well.
00:00 – 00:15 2. Fish paper on the positive ends, cells laid out to the BMS wiring
Put fish paper on every positive end for insulation; position the cells as the BMS wiring requires.
00:15 – 00:22 3. AWithZ supercapacitor spot welder, gear 10, manual pen
Using the AWithZ supercapacitor spot welder at gear 10, the pen with the manual button makes welding convenient; weld the cells, balance leads and power leads in turn; insulate the battery.
00:22 – 00:36 4. Main unit assembly: twin switches, power / charge port, sleep port
Rear panel, left switch for the battery, right switch for the main board; external power and charging port on top; sleep connector below; main board with four screws; secure the battery and wire it, mind the polarity; fit the rear panel, done.
00:36 – 00:54 5. Fit the handle and sleep socket, power on and test-solder
The outside fits seamlessly; plug in the handle and the sleep socket; switch on the battery and the main board; solder a board to test.
00:54 – 01:09
Bill of materials
| Li-ion cells ×6 | Power |
| BMS ×1 | With balance leads · Protection |
| 3D-printed shell ×1 | Self-designed · Enclosure |
| AWithZ supercapacitor spot welder (UF20B) ×1 | Gear 10, manual-button pen · Spot welding |
| Fish paper | Positive-end insulation |
| Main control board / switches / ports / handle / sleep socket | Soldering station |
Creator’s tips
- Fish paper on the positive ends first, then lay out the cells to the BMS wiring 00:15
- The manual-button pen makes welding convenient 00:26
- Twin switches control the battery and the main board separately 00:36
Pitfalls
- Comments: an AWithZ big-capacitor unit starved twice after sitting half a year and went back to the factory; don’t buy the big-capacitor type if you rarely use it
Li-ion safety
- Mind the battery polarity when wiring the circuit 00:44
Quotes


Comment insightsanswered 1 · open 0 · corrections 1
Answered by the creator
Corrections from viewers
My AWithZ sat for half a year and starved to death twice. First time a day and night of charging revived it, second time 36 hours of charging didn't, ended up sending it back. If you don't use it often, better not buy the big-capacitor kind
Reply @愿有岁月可回首:
My AWithZ sat for half a year and starved to death twice. First time a day and night of charging revived it, second time 36 hours of charging didn't, ended up sending it back. If you don't use it often, better not buy the big-capacitor kind
Reply @愿有岁月可回首:
My AWithZ sat for half a year and starved to death twice. First time a day and night of charging revived it, second time 36 hours of charging didn't, ended up sending it back. If you don't use it often, better not buy the big-capacitor kind
Reply @愿有岁月可回首: