
Building a car jump-starter power bank from 8 tabless Ampace JP40 cells





Creator’s own settings as stated in the video (timestamps link to the moment). Not official values — test on scrap first.
Bill of materials
Welder, accessories, consumables and parts used in this build; quantities and specs are editable Download BOMDescription
Hand-Built Bro’s 8-cell car jump starter: Ampace JP40 tabless 21700 (20C) in 2P4S, max ‘32000’ capacity, held in a holder with fish paper on the positives, stacked spot welds of 0.15 copper + 0.15 nickel-plated steel strip (main + / − use a long copper strip + two nickel squares), marked B-/B1/B2/B3/B+ to a 4S BMS (thin white wires + 16 AWG silicone wire), EC5 jump-start port, XT30 to a PD100W module, needs a charge to wake up the first time you press it, finished at 14.2V
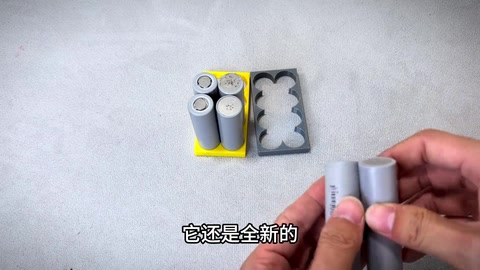
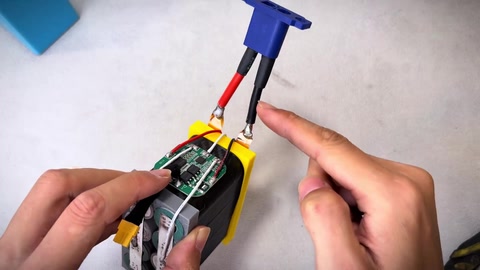
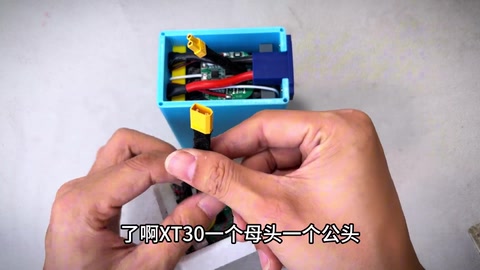
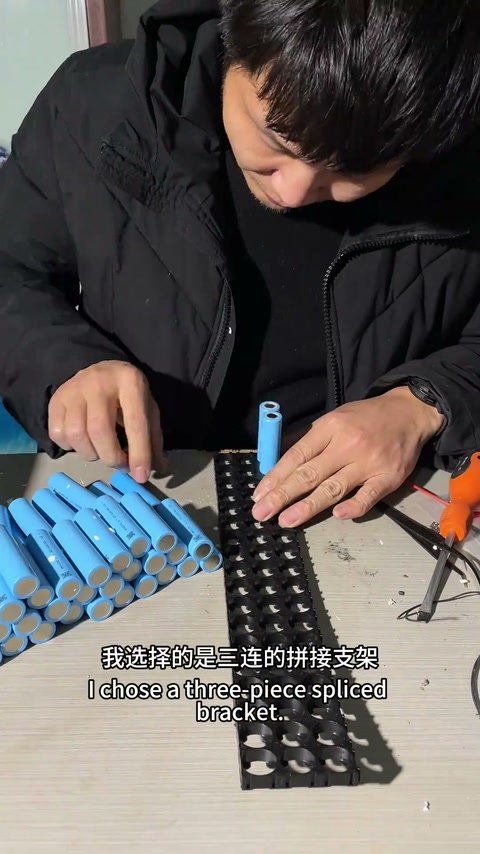
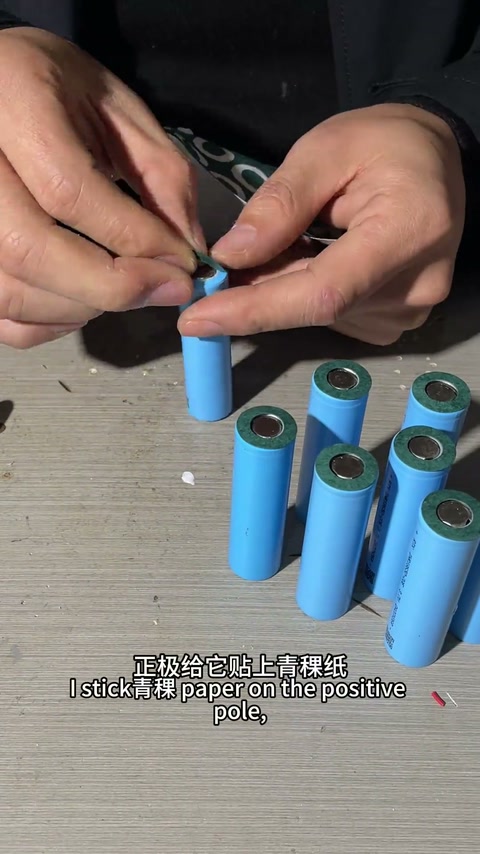
By viewer request, an 8-cell car jump starter. Cells are Ampace tabless 21700s, 20C burst discharge; layout two parallel, four series, max ‘32000’ (mAh) capacity. Cells fixed in a holder as 2P4S: the first series group two cells positive-up in the slots, the second group negative… (these were unpacked for an earlier video but are still brand new); fish paper on the positives; spot-weld in series with stacked copper: 0.15 copper on one side, 0.15 nickel-plated steel strip stacked on the other. Copper and nickel pre-cut; first weld the main + / − outputs: a slightly longer copper strip + two nickel squares, lay the copper first, then the nickel-plated steel on top, spot weld; the negative the same way; the upper part is welded across; flip and weld lengthwise (a layer of copper, a layer of nickel), note two places must not connect; + and − don’t need to connect anywhere else, follow the plan and it is correct. Mark positions with a marker: B- main negative, B+ main positive, B1, B2, B3; matching pads on the BMS: thin white wire for B1/B2/B3, thicker 16 AWG silicone wire for B+/B-. Into the box (a layer of white silicone rubber if you can); the EC5 connector is soldered to the two copper strips (rounded, full joints) and covered with heat-shrink; XT30 on the BMS P+/P- for easy connection to the PD module; EC5 screwed down, lower battery section done. The top cover takes the PD100W module on self-tapping screws; wiring done, the thin copper wire is the temperature sensor, place it anywhere; XT30 male-female plugged together. If nothing happens when you press it, don’t panic, charge it with the charger to wake it up. Case screwed on; EC5 for car jump starts, power-bank functions on top with two C ports and two A ports, voltmeter 14.2V, display shows 22% charge. Comments: will 18650 do; can it start a 2.5T; safe to leave in the car long-term; how many starts from 4000 capacity; is it 14V assembled; welder recommendation please.
Outcome
| Goal | 8 × 21700 car jump starter + power bank |
| Build | Ampace JP40 2P4S + 4S BMS + EC5 + PD100W module |
| Result | Finished at 14.2V, power-bank functions working · verified on camera: 379–388s voltmeter 14.2V, 22% charge |
Steps10 steps · click a frame to jump
 1. Plan: Ampace tabless 21700 20C, 2P4S, 32000
8-cell jump starter; Ampace tabless 21700, 20C burst; two parallel, four series; max 32000 capacity.
00:00 – 00:17 2. Holder as 2P4S, fish paper on the positives
Cells fixed in the holder as 2P4S; first series group positive-up in the slots, second group negative; the cells were unpacked before and are brand new; clip the holder on; fish paper on the positives.
00:17 – 00:53 3. Stacked copper welds: 0.15 copper + 0.15 nickel-plated steel strip
Spot-weld in series; stacked copper welding, 0.15 copper on one side and 0.15 nickel-plated steel strip stacked on the other; copper and nickel pre-cut.
00:53 – 01:10 4. Weld the main + / − outputs first (long copper + two nickel squares), then the upper part across
Main + / − outputs use a slightly longer copper strip + two nickel squares; lay the copper first, then the nickel-plated steel, spot weld; negative the same; the upper part is welded across.
01:09 – 01:49 5. Flip and weld lengthwise; watch the places that must not connect; mark the B-wire positions
The other side is welded lengthwise, a layer of copper and a layer of nickel; note here and here must not connect; + and − don’t connect anywhere else; mark the BMS wire positions with a marker.
01:53 – 02:30 6. B-/B+/B1/B2/B3 definitions and BMS mapping
B- main negative, B+ main positive, one down from B- is B1, above it B2, the other is B3; the BMS has B1 B2 B3 and B+ B-, wire them to match.
02:30 – 03:01 7. Solder the sense wires: thin white for B1/B2/B3, 16 AWG silicone for B+/B-
B1 white wire soldered to the pad and run to the marked spot; B2 soldered above; B3; three thin white wires; B+/B- use the thicker 16 AWG silicone wire.
03:07 – 03:58 8. Into the box; EC5 soldered to the copper with heat-shrink; XT30 on P+/P-
Into the box (white silicone rubber optional); check the EC5 position; EC5 soldered to the two copper strips with rounded, full joints, covered in heat-shrink; XT30 on the BMS P+/P- for easy connection to the PD module; EC5 screwed down.
03:58 – 05:14 9. PD100W module on the top cover; temperature sensor; charge to wake up
PD100W module fixed with self-tapping screws; wiring done; the thin copper wire is the temperature sensor, place it anywhere; XT30 male-female plugged together; if nothing happens when pressed, don’t panic, charge it with the charger to wake it up.
05:14 – 06:06 10. Finished: EC5 jump start + 2C2A power bank, 14.2V 22%
Case screwed on; EC5 for car jump starts; two C ports and two A ports for charging; voltmeter 14.2V, display shows 22%; good fun to build one yourself.
06:06 – 06:28
Bill of materials
| Ampace JP40 21700 ×8 | Tabless 20C 4000mAh · 2P4S |
| Cell holder | Mounting |
| Copper strip 0.15 / nickel-plated steel strip 0.15 | Stacked welds |
| Spot welder (P60F) ×1 | Stacked welds |
| 4S BMS ×1 | Protection |
| 16 AWG silicone wire / thin white wire | B wires |
| EC5 connector / XT30 | Jump-start port / module port |
| PD100W module + display ×1 | HJW9590 V3.0 · Power-bank functions |
| Box / top cover / heat-shrink / fish paper | Structure and insulation |
Measured on camera
| Finished voltage | 14.2 V 06:19 |
| Charge display | 22 % 06:19 |
Creator’s tips
- Stacking order: lay the copper first, then the nickel-plated steel, then spot weld 01:22
- Main + / − outputs use a long copper strip + two nickel squares to carry the jump-start current 01:09
- Mark the B-wire positions with a marker before welding; thin wire for B1–B3, thick for B+/B- 02:17
- XT30 on P+/P- makes hooking up the PD module easy 04:59
- If the button does nothing after assembly, charge it first to wake it up 05:53
- EC5 joints should be rounded and full, and covered with heat-shrink 04:47
Pitfalls
- When welding lengthwise on the other side there are two places that must not connect; get it wrong and it shorts 02:06
- Nothing happens on the first press (BMS asleep) 05:53
Li-ion safety
- Fish paper on the positives for insulation 00:40
- Comment: any safety issue leaving it in the car long-term (unanswered)
Quotes
Ideas for you
 Pinned07:55
 Rural Abiao39.9k28360
 03:22Rural Abiao6372783007:55Rural Abiao39.9k283617.0k