7.4V glue-stick mini fan tutorial, adjustable speed



Creator’s own settings as stated in the video (timestamps link to the moment). Not official values — test on scrap first.
Bill of materials
Welder, accessories, consumables and parts used in this build; quantities and specs are editable Download BOMDescription
Glue-stick mini fan tutorial: an empty 36g glue stick notched as the shell, two 16340s in series spot-welded with nickel strip on an AWithZ U3 Pro (auto mode), red and black wires welded on, potentiometer for speed + a switch, hot glue to hold it; only one cell can be charged at a time
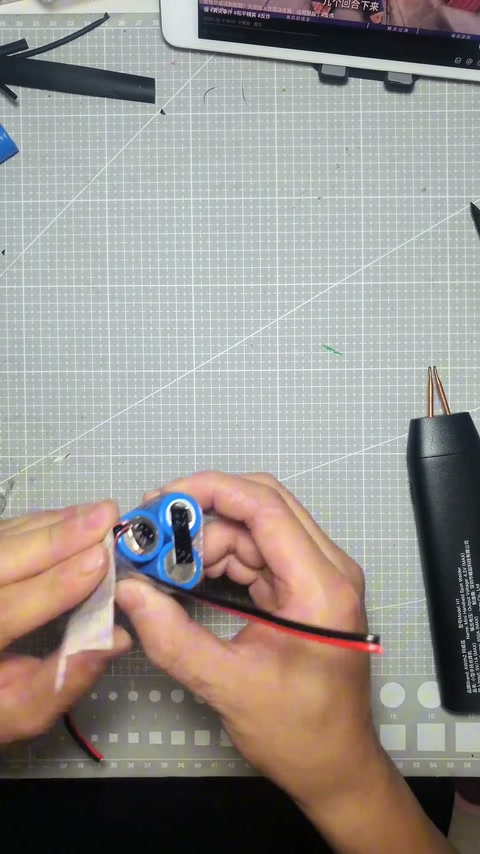
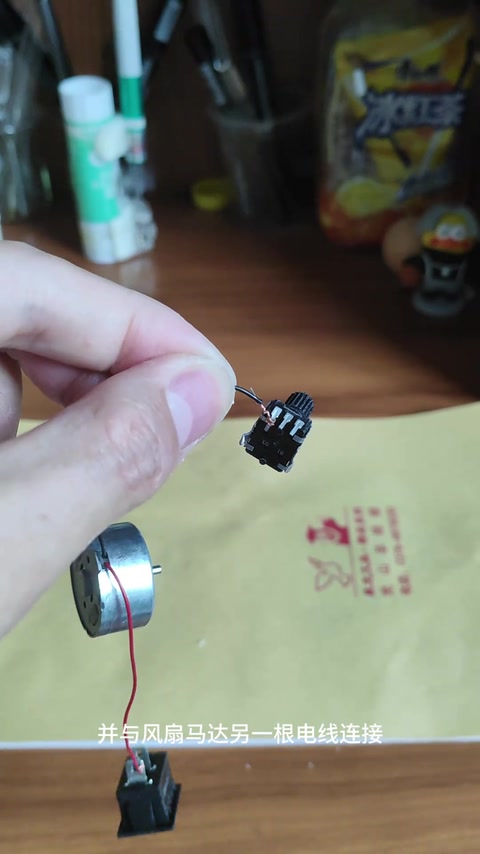
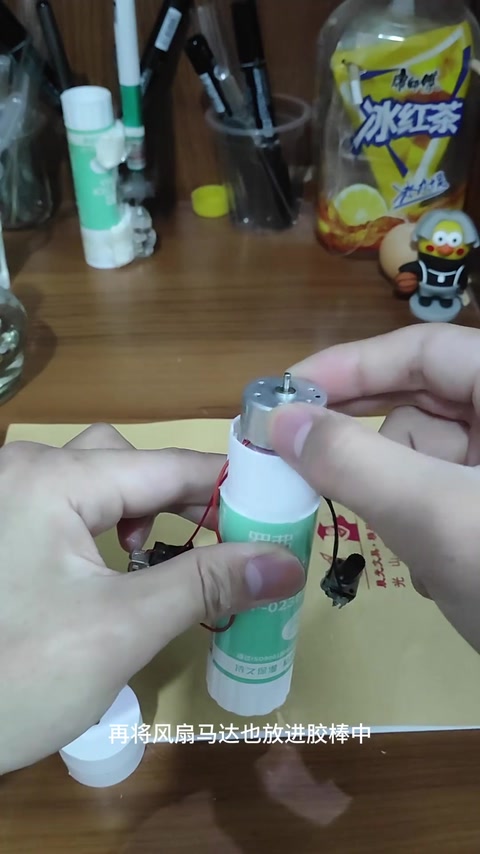
A speed-adjustable mini fan made from an empty 36g Luofu glue stick. The old method melts through the screw post inside the stick; a heated knife cuts two opposite notches in the head of the stick; a heated wire opens a big hole in the cap, then flip it and cut two more notches. Take two 16340 Li-ion cells (UltraFire marked 3200mAh) and the U3 Pro-edition spot welder gifted by AWithZ official, power on and set auto mode (the body also doubles as a power bank); series: place one + up and one − up, lay the nickel strip on and spot weld — very solid; flip over, wrap a short piece of nickel strip around the ends of two wires and weld them to the other face of the cells, red + black −. Without a spot welder you can use a conductive plate and wrap the wires with electrical tape. Fan motor + switch, plus a low-value potentiometer for speed: bend one pin of the potentiometer to the motor’s other wire; red wire to the switch, black wire to the potentiometer’s middle pin; hot glue holds the wires; fold the side-by-side pack upright into the stick, drop in the motor, cap it; hot glue holds the potentiometer and switch, tape wraps the wires, fit the blades. Done, the potentiometer sets the speed; to charge you take it apart — only one cell at a time. Top-liked comment (45) warns ‘who taught you to spot weld like that? one cell going off because you didn’t press down and you’ll behave’ (creator liked it); suggestions: just wire it with a soldering iron, add a TP4056 charger, use a test tube for the shell, swap in a hobby-grade motor.
Outcome
| Goal | 7.4V speed-adjustable mini fan in a glue-stick shell |
| Build | 2 × 16340 in series + motor + switch + potentiometer |
| Result | Done, speed adjustable · verified on camera: 129–138s starts and speed is adjusted |
Steps6 steps · click a frame to jump
 1. Glue-stick shell: melt the screw post, cut notches, open the cap
Empty 36g glue stick, the old method melts through the screw post; a heated knife cuts two opposite notches in the head; a heated wire opens a big hole in the cap, flip and cut two more notches.
00:00 – 00:24 2. Two 16340s in series, U3 auto mode spot-welds the nickel strip
Two 16340s + the U3 Pro gifted by AWithZ official; auto mode; the body also doubles as a power bank; place one + up and one − up, lay the nickel strip on and weld — very solid.
00:25 – 00:53 3. Flip and weld the red and black wires; the no-welder alternative
Flip over; wrap a short piece of nickel strip around the wire ends and weld to the other face; red + black −; without a spot welder, use a conductive plate and wrap the wires with electrical tape.
00:54 – 01:17 4. Motor + switch + potentiometer speed wiring
Connect the fan motor and switch; a low-value potentiometer for speed, bend one pin to the motor’s other wire; red wire to the switch, black wire to the potentiometer’s middle pin; hot glue to hold.
01:17 – 01:41 5. Fit into the glue stick, fix, mount the blades
Fold the side-by-side pack upright into the stick; drop in the motor, cap it; hot glue holds the potentiometer and switch, tape wraps the wires; fit the blades.
01:41 – 02:09 6. Done, speed control; take apart to charge one cell at a time
Finished, it starts and the potentiometer sets the speed; to charge, take it apart — only one cell at a time.
02:09 – 02:23
Bill of materials
| 36g solid glue stick (empty) ×1 | Luofu LF-0236A · Shell |
| 16340 Li-ion cells ×2 | UltraFire 3.7V · Power source |
| AWithZ U3 Pro-edition spot welder ×1 | Gifted by AWithZ official · Spot welding |
| Nickel strip / red and black wires | Connections |
| Fan motor + blades ×1 | Drive |
| Switch / potentiometer | Low value · On/off and speed |
| Hot-glue gun / heated knife / wire / tape | Shaping and fixing |
Creator’s tips
- Wrap a short piece of nickel strip around the wire end first, then spot weld it to the cell 00:58
- No spot welder? Use a conductive plate and wrap the wires with electrical tape 01:07
- A low-value potentiometer in one motor lead gives speed control 01:21
Pitfalls
- Top-liked comment: the welds weren’t pressed down — risk of a cell going off (creator liked it)
- No charging circuit; charging means taking it apart and doing one cell at a time 02:18
Li-ion safety
- Press the welding pins down firmly when spot welding; a weak weld or arcing is a risk (comment)
- Mind burns when opening holes with a heated knife / wire 00:10