
Ep. 42 | Turning a storage box into a solar-charged outdoor power station? Build a fun, practical multi-function solar-charging outdoor power station from a plain storage box — so useful!

Creator’s own settings as stated in the video (timestamps link to the moment). Not official values — test on scrap first.
Bill of materials
Welder, accessories, consumables and parts used in this build; quantities and specs are editable Download BOMDescription
90 × 18650 in five 3S6P groups paralleled into one big 12V battery; a storage box becomes a solar outdoor power station: 1kW inverter + 90W fast charge + 22W wireless charging + thermostat-controlled fans
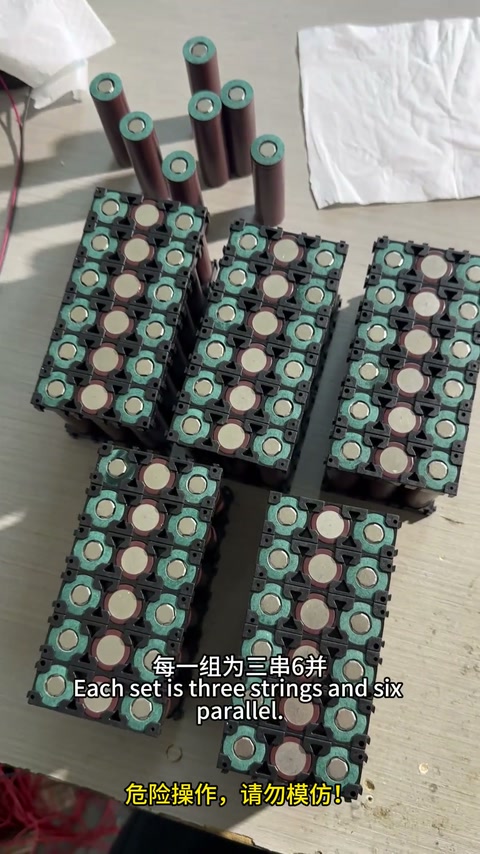
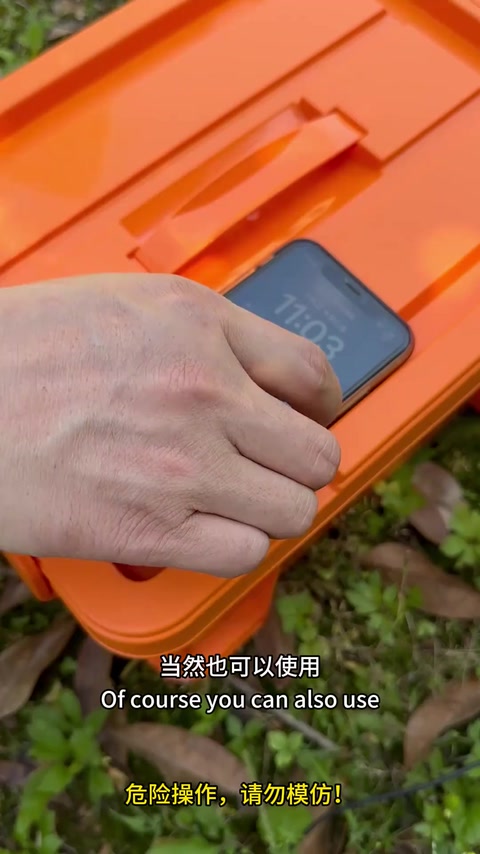
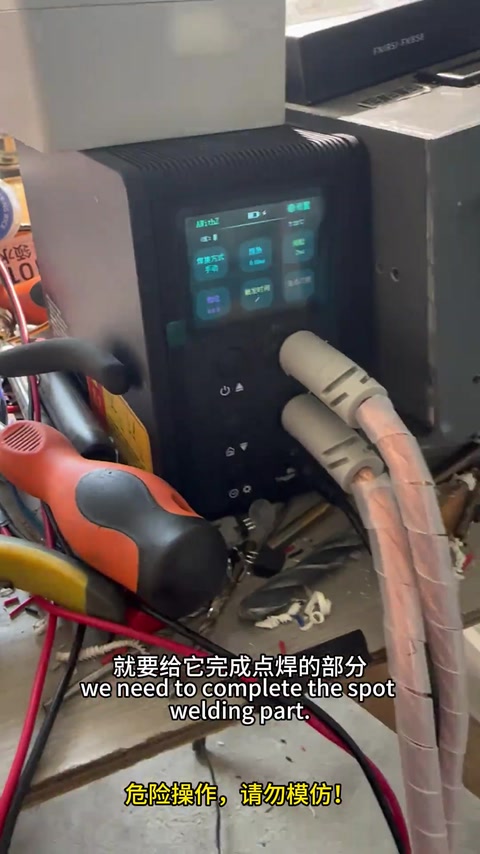
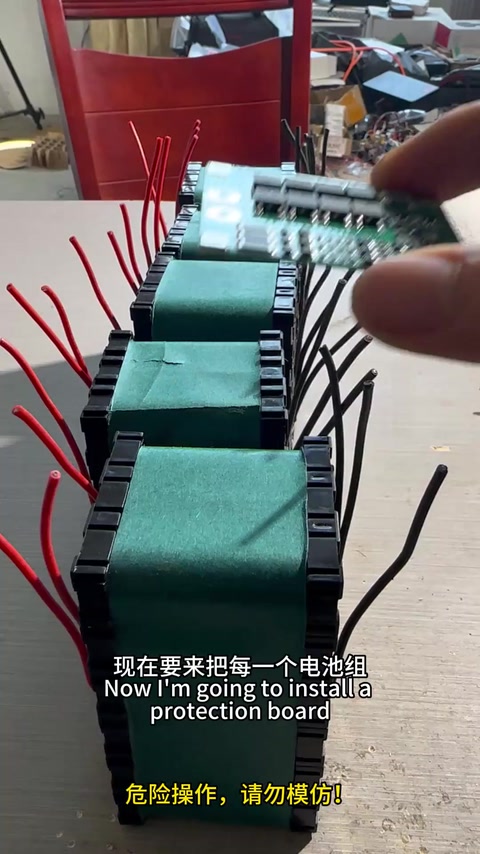
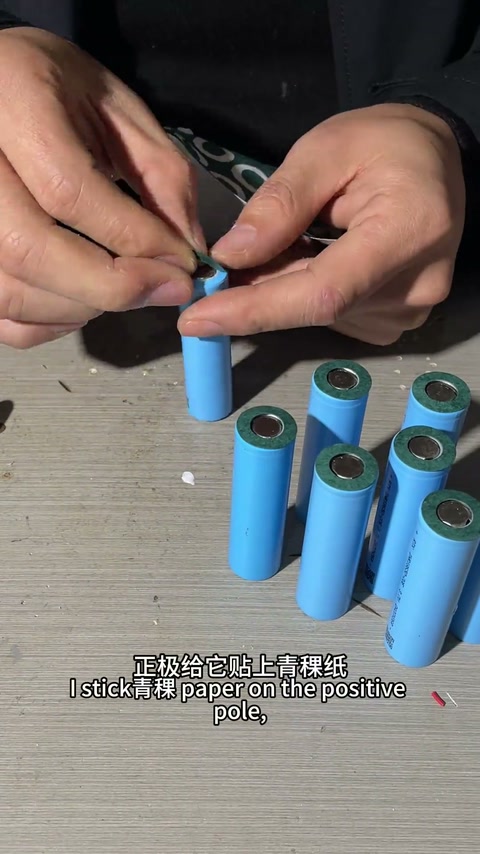
The creator buys 100 × 18650 cells at ¥2.5 each (2000mAh, 5C discharge), tests the internal resistance of every one (3 read high and are rejected), picks 90, puts a fish-paper ring on each positive end, loads them into holders and builds five 3S6P packs. When spot welding, a copper strip is laid under the nickel strip to raise current capacity; each group is wrapped in fish paper, gets its balance lead and main + / − brought out (thicker wire for current), gets its own BMS, then is wrapped in fish paper again and bound with fiber tape. The storage box (with carry handle) gets a battery fuel gauge top-left and a voltmeter top-right, a front cutout for the 90W charging module, one cooling fan on each side (one intake, one exhaust), an aviation connector with waterproof cap on the back as the charge port, and a 22W wireless charging module; the five packs sit in the bottom of the box, the output leads are twisted into one bundle (one thick, three thin), tinned with a flame and covered in heat-shrink. Charging goes through a constant-voltage / constant-current buck-boost module, DC input up to 30V (a solar panel under 30V can be connected), output set to about 12.7V with a multimeter; two thermostat switches, one stuck to the buck-boost module heatsink and one to the inverter housing, control the fans; the thick leads get crimped terminals reinforced with molten solder to the 1kW inverter, and two 220V sockets are paralleled onto the inverter output. A ‘dangerous operation, do not imitate’ warning stays on screen for the whole video.
Outcome
| Goal | Build a multi-function outdoor power station from a plain storage box that can charge from solar and run an electric cooker |
| Build | Storage-box power station with 90 × 18650 in five 3S6P groups in parallel + 1kW inverter + 90W/22W charging + thermostat-controlled fans |
| Result | Finished; demonstrates solar-panel charging, 90W USB fast charge and the fuel gauge · verified on camera: Finished-product demo at 330–356s; the voltmeter follows the charge (205–211s) |
Steps13 steps · click a frame to jump
 1. Goal and parts: 100 × 18650 at ¥2.5
Nearly 100 × 18650 + a plain storage box; solar charging, cooking on an electric pot, 90W phone fast charge, 22W wireless charging; cells at ¥2.5 each, 2000mAh, 5C discharge, and consistency is what matters.
00:00 – 00:26 2. Test every cell’s internal resistance, reject 3, fish paper on the positive end
All 100 tested, 3 read slightly high; a big pack needs solid insulation, so each positive end gets a fish-paper ring; 90 cells chosen.
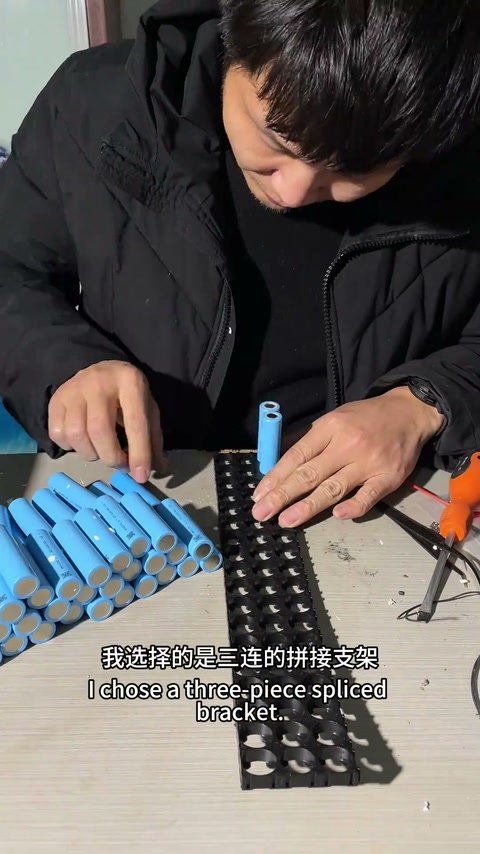
00:26 – 00:39 3. Load the holders: 5 groups of 3S6P, copper strip under the nickel, spot weld
Into cell holders, 5 groups, each 3S6P; the welding part is fast-forwarded ‘with magic’; a copper strip under the nickel strip raises current capacity.
00:39 – 00:53 4. Wrap each group in fish paper, bring out leads, fit a BMS
Wrap in fish paper, bring out the balance leads (a single wire is enough) and the main + / − (thicker for current); each group gets its own BMS with the + / − output leads taken from it; wrap in fish paper again and fix with fiber tape — 99% done.
00:53 – 01:21 5. Cut the box for the voltmeter, fuel gauge and 90W charging module
The storage box has its own handle; holes top-left and top-right for the battery fuel gauge and voltage display; a USB cutout in the front (hard to cut, looks a bit rough); fit the 90W charging module and two square-hole modules.
01:21 – 02:01 6. Fans on both sides, aviation charge connector on the back, 22W wireless charger
Some modules run hot, so a fan goes in each side of the box (one intake, one exhaust); a hole in the back for an aviation connector with waterproof cap as the charge port; fix the 22W wireless charging module.
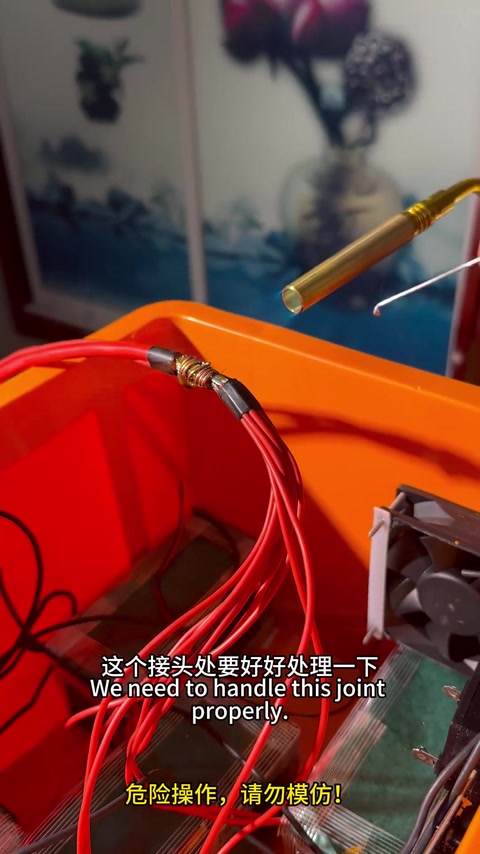
02:01 – 02:27 7. Five packs into the box bottom, output leads twisted, tinned and heat-shrunk
The five packs go into the bottom of the box; all output leads twisted into one bundle, main output is one thick plus three thin; the joint is tinned over a flame then insulated with heat-shrink, negative done the same; an acrylic plate goes over the packs to carry the charging input wiring.
02:27 – 03:07 8. CV/CC buck-boost charging, set to about 12.7V
Wide-voltage input suits more chargers; feed DC under 30V into the charge port and set the module output to about 12.7V with a multimeter; the voltmeter follows during charging; the module gets very hot, so mount it near a fan.
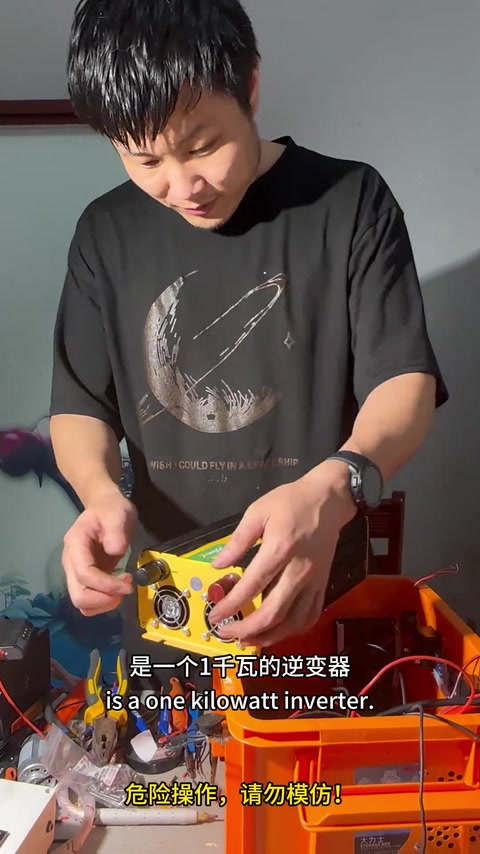
03:07 – 03:45 9. Crimp and solder the thick leads, connect the 1kW inverter
Terminals on the thick leads — without a proper crimper they won’t crimp tight, so reinforce with molten solder; connect the 1kW inverter + and −, wire the 220V output side then fit it in the box; wire the fans, splitting the positive into two.
03:45 – 04:26 10. Two thermostat switches control the fans
Each fan branch goes through a thermostat switch, the other side to the battery output positive; one switch is stuck to the buck-boost module heatsink, one to the inverter housing.
04:26 – 04:52 11. Wire the switch, wireless charger and fuel gauge
The third positive branch goes to the switch input; the wireless charger’s power lead is extended (easier to open the lid); the wireless charger and fuel gauge positives both go to the switch output positive, negatives to the reserved third negative branch.
04:52 – 05:16 12. Two 220V sockets in parallel on the inverter
The extension leads go to the live and neutral terminals (AC has no polarity); the two sockets are paralleled then connected to the inverter’s 220V output.
05:16 – 05:30 13. Done: solar charging, 90W fast charge, clear fuel gauge
Any solar panel under 30V can charge it; 90W USB fast-charge protocol; the fuel gauge is easy to read.
05:30 – 06:01
Bill of materials
| 18650 cells ×100 bought / 90 used | 2000mAh 5C, ¥2.5 each · Pack body |
| Cell holders ×5 sets | Hold the cells |
| Fish paper / fiber tape | Insulation and reinforcement |
| Nickel strip + copper strip | Spot welding, copper for current capacity |
| BMS ×5 | One per group |
| Storage box (with handle) ×1 | Enclosure |
| Battery fuel gauge / voltmeter ×1 each | Display |
| USB charging module ×1 | 90W · Fast charge |
| Wireless charging module ×1 | 22W · Wireless charging |
| Cooling fans ×2 | One intake, one exhaust |
| Aviation connector (waterproof cap) ×1 | Charge port |
| Acrylic plate ×1 | Mounting plate over the packs |
| CV/CC buck-boost module ×1 | ≤30V input · Charging |
| Crimp terminals + solder | Thick leads to the inverter |
| Inverter ×1 | 1kW · 220V output |
| Thermostat switches ×2 | Fan control |
| 220V sockets ×2 | Output |
| Heat-shrink tubing | Joint insulation |
Measured on camera
| Welder screen temperature | 22 °C 00:45 |
| BMS tap voltage display | 7.4V / 11.1V / 3.7V 01:10 |
Creator’s tips
- Consistency matters most in a big pack: test the internal resistance of all 100 and reject the high ones 00:24
- Copper strip under the nickel and thicker main + / − leads raise current capacity; a single wire is enough for each balance lead 00:50
- The buck-boost module runs hot — mount it near a fan; stick the thermostat switches on the parts that heat up 03:38
- No proper crimper? Reinforce the terminals with molten solder 03:58
- The wide-voltage charge input takes a solar panel under 30V directly 03:07
Pitfalls
- The square USB cutout in the storage box is hard to cut and the result looks a bit rough (comments offered two ways to cut it) 01:44
Li-ion safety
- A ‘dangerous operation, do not imitate’ warning stays on screen for the whole video 00:00
- A big pack needs solid insulation: fish paper on every positive end, each group wrapped in fish paper, an outer wrap plus fiber tape 00:30
- Heat-shrink over the soldered joints; on the 220V AC side wire live and neutral 02:50
Quotes
Cost & time
| 18650 ×100 | ¥About ¥250 (¥2.5 each) |
Ideas for you
 Pinned07:55Rural Abiao39.9k28360
 03:22Rural Abiao6372783007:55Rural Abiao39.9k283617.0k
Comment insightsanswered 1 · open 2 · corrections 3
Answered by the creator
Open questions
Corrections from viewers
For personal use, better not keep it indoors! If you’ve got a charmed life, forget I said anything! Once cells are wired straight in parallel you can’t measure a single cell’s voltage! Say ten 3.7V 18650s in parallel — with 9 dead it still reads 3.7V! And there’s no multi-parallel BMS on the market!
Reply @用户9123708544929:
For personal use, better not keep it indoors! If you’ve got a charmed life, forget I said anything! Once cells are wired straight in parallel you can’t measure a single cell’s voltage! Say ten 3.7V 18650s in parallel — with 9 dead it still reads 3.7V! And there’s no multi-parallel BMS on the market!
Reply @用户9123708544929:
For personal use, better not keep it indoors! If you’ve got a charmed life, forget I said anything! Once cells are wired straight in parallel you can’t measure a single cell’s voltage! Say ten 3.7V 18650s in parallel — with 9 dead it still reads 3.7V! And there’s no multi-parallel BMS on the market!
Reply @用户9123708544929: