Spent ¥127 on a high-power flashlight that lights up a whole building — no more fear of walking at night; 15 cells give 12 hours of runtime



Creator’s own settings as stated in the video (timestamps link to the moment). Not official values — test on scrap first.
Bill of materials
Welder, accessories, consumables and parts used in this build; quantities and specs are editable Download BOMDescription
A ¥127 ‘light up a whole building’ flashlight (10-minute tutorial): a ¥19 18W car spotlight converted to a 100W all-in-one temperature-controlled LED board (70 LEDs), step-drill bored to M10, thermal grease, 704 sealant; a Dayi-style 21700 battery case with 15 × 4000mAh 40A cells, pack welded on an AWithZ welder, charge/discharge BMS, tested outdoors
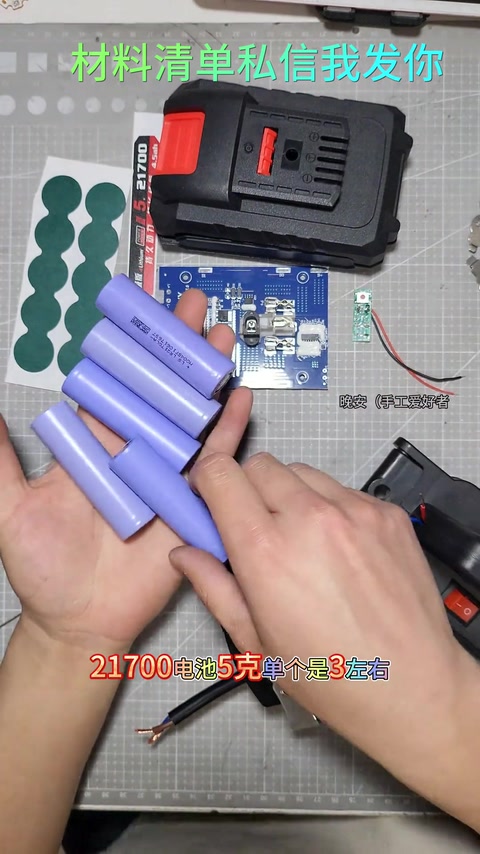
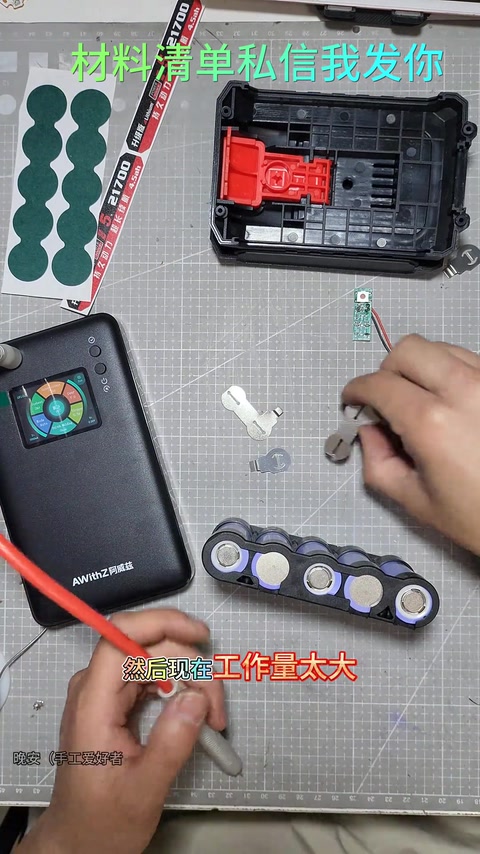
The most detailed tutorial on the net: spend ¥100-odd on a flashlight that lights up a whole building, and along the way learn a universal car / e-bike / motorbike spotlight and a universal drill battery pack. Spotlight: a ¥19 18W car spotlight from Taobao, converted to 100W; the LED board is made by a friend (upgraded version about ¥70, link on request), about 70 LEDs; materials: retaining ring, 4 screws, step drill bit, thermal grease, 63% solder wire 0.8mm, quick connector (not needed for the flashlight, for bare car-light installs). Remove the 4 faceplate screws and the centre screw to take out the reflector (don’t touch the inside of the reflector, it leaves fingerprints), 2 board screws, cut the positive and negative wires; bore out the original glue hole with the step drill for a thicker power cable; the original 18W board can become a desk lamp. Coat the back of the housing / board with thermal grease (the thinner the better), wipe the LEDs with a cotton swab and alcohol; drop in the retaining ring to hold the reflector; the original 50-LED reflector must be bored to M10 for 70 LEDs, control the force; solder the power leads to + and −, if the pads won’t take solder scrape them a few times with a blade and add flux; feed the wire ends through the hole into the housing before soldering to the board, joints should be rounded; fix the cable hole with Kafuter 704 silicone sealant for waterproofing; fit the reflector, the seal ring, tighten the centre screw, the clear lens, screws; power-on test OK, apply waterproof sealant; the spotlight has thermal protection. Handle ¥7 from Pinduoduo, 21700 battery case (Dayi-style, drill-compatible) about ¥11 from Taobao; 21700 cells about ¥3 each, 4000mAh, 40A discharge; the welder is an AWithZ. Twist the spotlight’s blue (−) and red (+) wires together and reinforce with solder; wiring fast-forwarded (the phone overheated and the step of placing the power cells into the retaining ring was missed: place them one by one following + and − on the circuit board, DM if unsure, see the April 12 drill battery tutorial); after welding the pack, fit the charge/discharge BMS with two diagonal screws, solder the joints with a soldering iron, rounded joints; put the pack into the bottom shell, button spring, solder + and − to the charge indicator, fit the charge indicator plate as trim, top cover screws, stick on the ‘Upgraded — lasting power’ decal; power-on test, switch works; outdoor test ‘the whole building lit up’, shot on a stock Samsung camera with no exposure adjustment; this is the flood version, swap the reflector for a spot beam; parts list by DM. Comments: the all-in-one board throttles after 30 seconds / a minute or two (an 18W housing converted to 100W can’t shed the heat, 17/14 likes); at nearly 200W the battery lasts an hour at most; no driver? creator: all-in-one temperature-controlled board; missing a cooling fan; a four-leaf CNC housing costs ¥300.
Outcome
| Goal | ¥127 DIY high-power flashlight (spotlight + 21700 pack) |
| Build | 18W→100W all-in-one temperature-controlled LED spotlight + 15 × 21700 4000mAh pack (Dayi-style case) |
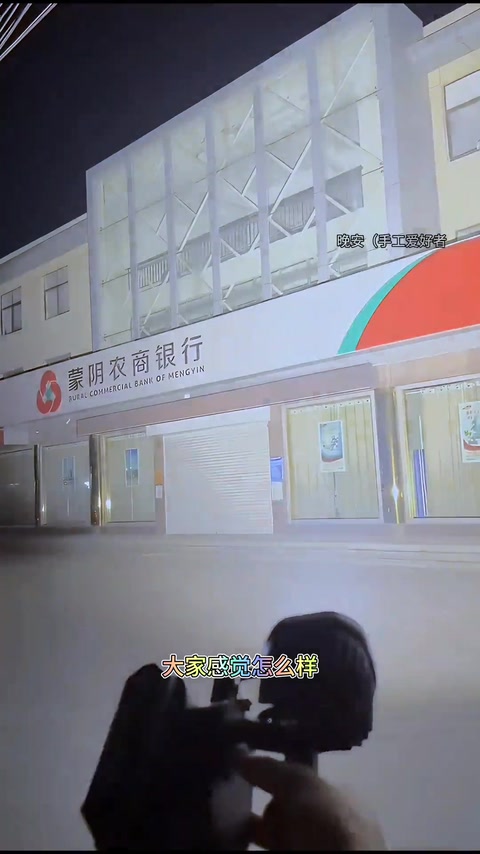
| Result | Finished, extremely bright in the outdoor test; 12-hour runtime (per title) · verified on camera: 337s power-on test; 574–611s outdoor footage |
Steps12 steps · click a frame to jump
 1. Opening: ¥100-odd for a flashlight that lights up a whole building
Ugly but really bright; the most detailed tutorial on the net; learn a universal spotlight and a universal drill battery pack.
00:00 – 00:35 2. Materials: ¥19 18W spotlight, 100W board conversion, etc.
Spotlight ¥19 18W from Taobao, converted to 100W; board made by a friend, upgraded version about ¥70 (link on request); retaining ring, 4 screws, step drill bit, thermal grease, 63% solder wire, quick connector (not needed for the flashlight).
00:35 – 01:21 3. Strip the spotlight: faceplate screws, reflector (don’t touch the inside), board, cut wires; bore with the step drill
Remove the 4 faceplate screws; the centre screw releases the reflector, don’t touch the inside with your fingers or you leave prints; 2 board screws; cut the + and − wires; bore out the original glue hole with the step drill to fit a thicker cable.
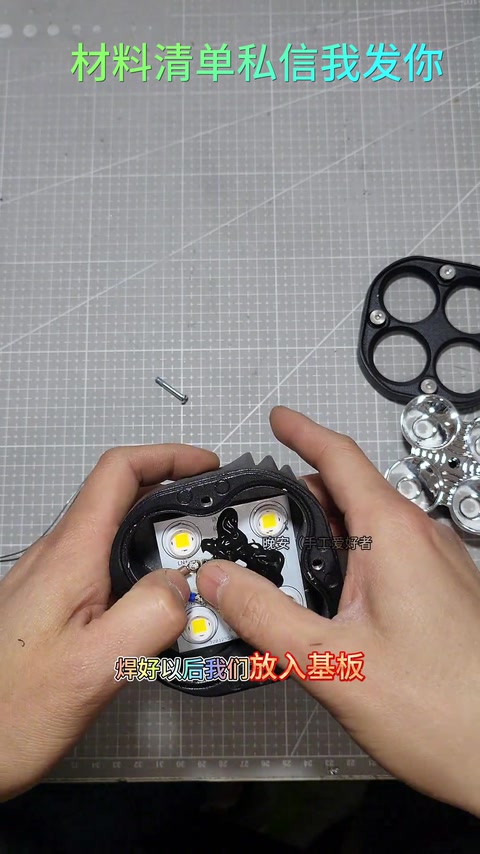
01:21 – 02:15 4. Thermal grease, wipe the LEDs, seat the reflector with the retaining ring
Higher power means a bigger power cable; the original board can be an 18W desk lamp; coat the housing / back of the board with thermal grease, the thinner the better; wipe the LEDs with a cotton swab and alcohol; drop in the retaining ring to hold the reflector; four-leaf all-in-one board.
02:15 – 03:05 5. Bore the reflector to M10 (50 LEDs → 70 LEDs)
The original 50-LED reflector needs boring out to M10 with the step drill for 70 LEDs, control the force; wipe it clean, seat the retaining ring and check the fit is seamless; solder the power leads to + and −.
03:05 – 03:47 6. Pads won’t take solder: scrape with a blade + flux; feed the wire through, solder to the board, rounded joints
If the pads won’t wet, scrape them a few times with a blade for grip and add flux; feed the wire ends through the hole into the housing and pull them long, solder + and −, rounded joints take load better.
03:55 – 04:59 7. 704 sealant for waterproofing, fit the reflector, seal ring and lens, power-on test
Fix the cable hole with Kafuter 704 silicone sealant for waterproofing; fit the reflector, seal ring, tighten the centre screw; clear lens screws; power on OK; apply waterproof sealant; the spotlight has thermal protection.
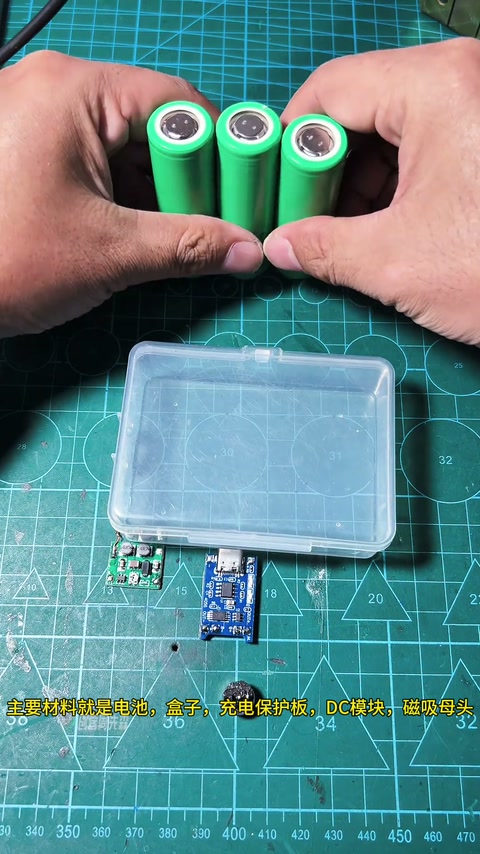
04:59 – 05:48 8. Handle / battery case / 21700 cells / AWithZ welder
Handle about ¥7 from Pinduoduo (Dayi-style); 21700 battery case, Dayi-style drill-compatible, about ¥11 from Taobao; 21700 cells about ¥3 each, 40A discharge, 4000mAh; the welder is an AWithZ.
05:48 – 06:28 9. Wire spotlight to handle: blue −, red +, reinforce with solder
Twist the spotlight’s two wires (blue −, red +) together and reinforce with solder, tinning the joint conducts better; wiring fast-forwarded; tuck the wire ends into the shell and fix the head.
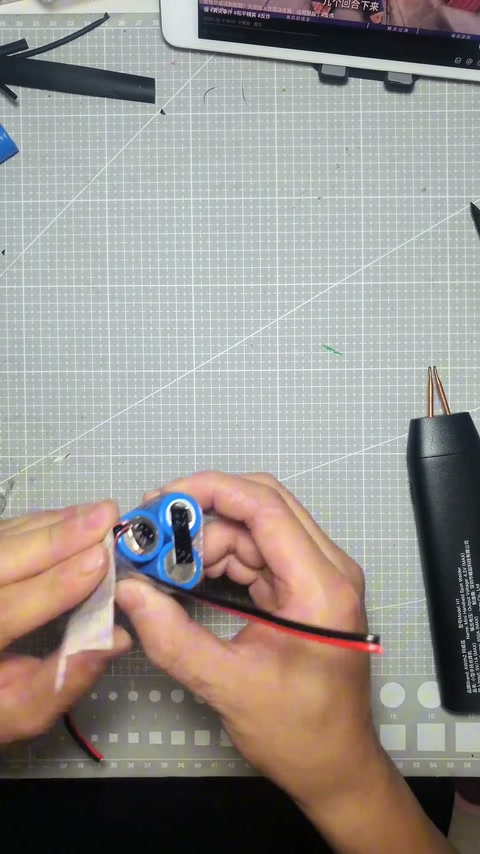
06:29 – 07:20 10. AWithZ welder recommendation; cell placement (missed on camera) follows + / − on the board
Recommends the AWithZ welder — had a small one before, bought the advanced version for the heavier workload, almost two years in, a loyal fan; the phone overheated and quit recording, so placing the cells into the retaining ring was not filmed; place them one by one following + and − on the circuit board, DM if unsure, see the April 12 drill battery tutorial.
07:20 – 08:25 11. Fit the charge/discharge BMS, solder with the iron, bottom shell spring and charge indicator, decal
After welding the pack, fit the charge/discharge BMS with two diagonal screws; solder the joints with a soldering iron, rounded joints; pack into the bottom shell, button spring, solder + and − to the charge indicator, charge indicator plate as trim; top cover screws; stick on the ‘upgraded’ decal; pack done, power-on test.
08:25 – 09:34 12. Outdoor test: the whole building lit up; flood version
Switch works; outdoor test lights up the whole building; stock Samsung camera, no exposure adjustment; tested on open ground by the river; even ghosts would be scared walking at night; this is the flood version, swap the reflector for spot; parts list by DM.
09:34 – 10:48
Bill of materials
| Car spotlight ×1 | 18W, ¥19 · Conversion base |
| All-in-one temperature-controlled LED board ×1 | 100W 70 LEDs, about ¥70 · Light source |
| Retaining ring / screws / step drill bit / thermal grease / 63% solder wire / quick connector | Spotlight conversion |
| Kafuter 704 silicone sealant ×1 | Waterproofing |
| Handle (Dayi-style) ×1 | Pinduoduo ¥7 · Grip |
| 21700 battery case (Dayi-style) ×1 | Taobao ¥11 · Pack housing |
| 21700 cells ×15 | 4000mAh 40A about ¥3 · Battery pack |
| AWithZ spot welder (U3pro) ×1 | Advanced version · Spot welding |
| Charge/discharge BMS / charge indicator / decal | Battery pack |
| Soldering iron HX-T100, solder ×1 | 1.2mm · Soldering |
Creator’s tips
- Don’t touch the inside of the reflector when removing it; fingerprints are hard to wipe off 01:35
- Thermal grease, the thinner the better; dusty LEDs get a cotton swab with alcohol 02:40
- If the pads won’t take solder, scrape them a few times with a blade, then add flux 03:55
- Rounded solder joints take load better; tinning the joint conducts better 04:47
- 704 sealant on the cable hole for waterproofing 04:59
- Place the cells one by one following + and − on the BMS; if unsure, take a photo and DM 08:00
Pitfalls
- The phone overheated and quit recording, so the cell placement step was missed 07:46
- Comment: an 18W housing converted to 100W can’t shed the heat, it throttles after 30 seconds to a minute or two; at nearly 200W the battery lasts an hour at most; no fan
- Control the force when boring out the hole 03:20
Li-ion safety
- The spotlight has thermal protection; it throttles during long use 05:48
Quotes
Cost & time
| Spotlight | ¥19 |
| All-in-one LED board | ¥70 |
| Handle | ¥7 |
| Battery case | ¥11 |
| 21700×15 | ¥45 · About ¥3 each |
| Total | ¥127 |