Built a 48V LiFePO4 battery for the family e-bike myself — the whole process on record, in a mere 30 minutes of video


Creator’s own settings as stated in the video (timestamps link to the moment). Not official values — test on scrap first.
Bill of materials
Welder, accessories, consumables and parts used in this build; quantities and specs are editable Download BOMDescription
16 × 15Ah LiFePO4 cells in 16S1P for a 48V e-bike battery, the full 30 minutes: nickel strip stacked on copper, a self-built welder that overheated and stopped work, a 60V/20A Bluetooth BMS, 16.5A measured on the bike
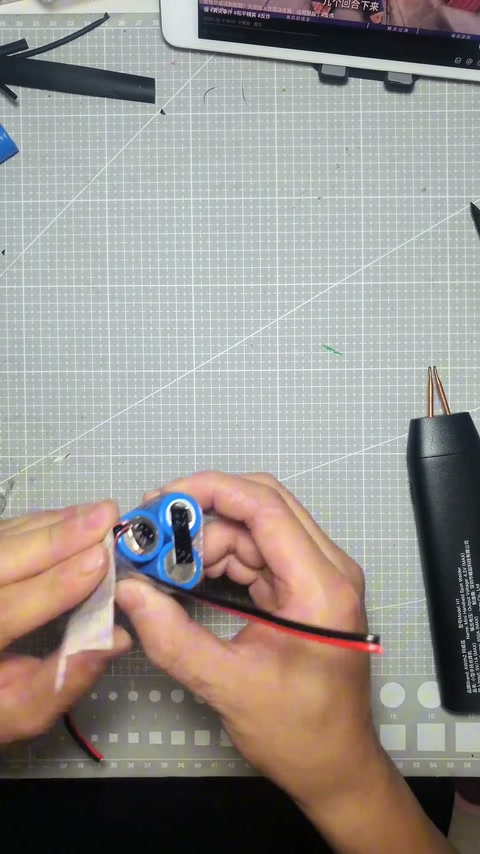
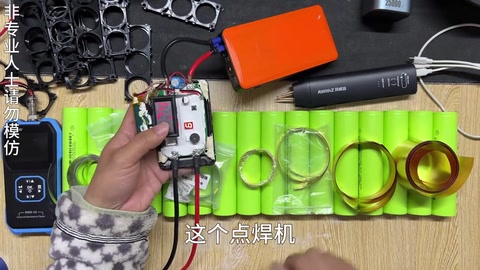
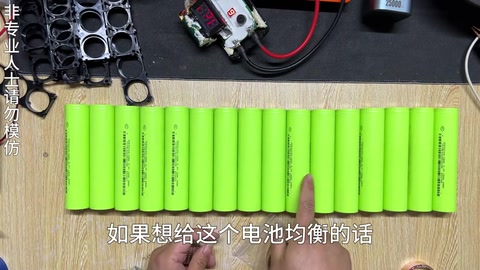
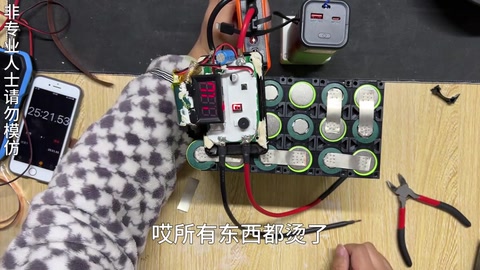
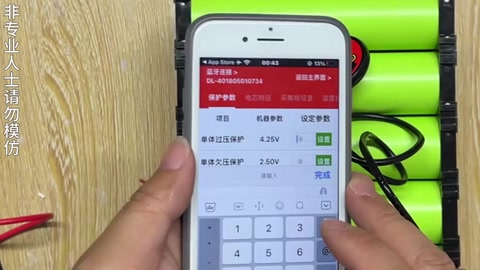
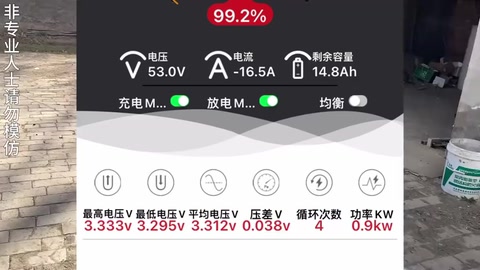
The creator builds a 48V LiFePO4 battery for an e-bike that has run on lead-acid for three or four years: 16 × 3.2V/15Ah cells all in series come to exactly 48V. To carry more current he stacks copper strip on nickel strip, and first tries two machines: the self-built welder welds 0.12 nickel-plated steel strip + 0.1 copper, the handheld welder welds 0.12 + 0.05 copper, both solid, and he mainly uses the self-built one (it can weld thicker copper). All 16 cells read 3.297V with 1.7–2mΩ internal resistance, so he builds without balancing. Triple holders are assembled (one holder with four extra corners wouldn’t fit and got trimmed), insulating paper applied, nickel and copper strip 15mm wide, the nickel strip’s sharp corners trimmed on the positive side; the jump starter that powers the welder is put on charge. During welding the self-built machine (with added capacitors, shortened leads and swapped MOSFETs), its thermal pad, the jump starter and the cells all get too hot to touch, so he keeps stopping to cool them with a fan; the jump starter won’t charge at 5V2A, so he pulls the 60V/20A Bluetooth BMS (switchable NMC / LiFePO4) from a previous 21700 pack. After several ‘won’t weld’ episodes he finds he had stacked two layers of copper by mistake; later he adds nickel strip to compensate. Main + to main − reads 52.7V, total internal resistance 32mΩ. 704 silicone to fix, mesh double-sided tape for the ribbon, sense leads soldered group by group and tinned (‘nearly had an accident’), lead order checked, 3 hours 40 minutes in total; the Bluetooth app gets LiFePO4 settings: over-voltage 3.65, under-voltage 2.3, balancing from 3.5; insulating board, main positive and temperature probe go in, insulating paper on, and heat-shrink film can be done with a hair dryer (keep it out of the sun). Lead-acid measures 89mΩ for comparison; the battery bay is bigger than expected (would take 48V30Ah); adhesive-lined heat-shrink for waterproofing; on the bike the app shows 53.0V, -16.5A, 14.8Ah, 0.038V delta, 0.9kW. LiFePO4 isn’t ideal for northern winters, but it’s cheap, safe and fades less than lead-acid. The top comment says the video is too long.
Outcome
| Goal | Build a 48V 15Ah LiFePO4 battery for the e-bike to replace lead-acid |
| Build | 16S1P LiFePO4 15Ah + 60V/20A Bluetooth BMS |
| Result | Fitted to the bike, app shows 53.0V / 16.5A / 14.8Ah, 0.038V delta · verified on camera: 893–904s reads 52.7V; 1744–1758s app readings on the bike |
Steps12 steps · click a frame to jump
 1. The plan and a test weld on two welders
3.2V 15Ah per cell, 16 in series for 48V; copper strip stacked on nickel for more current; the self-built machine welds 0.12 nickel-plated + 0.1 copper, the handheld welds 0.12 + 0.05 copper, both solid; the self-built one is the main tool since it can weld thicker copper.
00:00 – 00:57 2. Measure voltage and internal resistance; balancing method (not done)
All cells at 3.297V, internal resistance 1.7–2mΩ, none over 2; to balance you could join positive to positive with small magnets + copper strip and charge them together; no balancing this time — LiFePO4 must be charged up before paralleling.
00:57 – 02:01 3. Assemble triple holders, insulating paper, trim the nickel, charge the jump starter
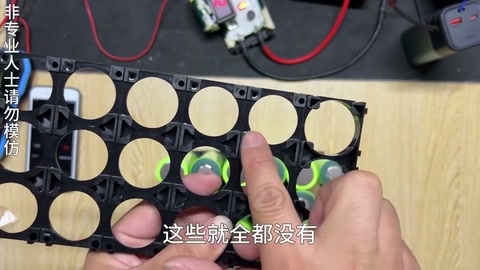
Triple holders, timer running; plan the layout so + and − end up on the same side; one holder with four extra corners wouldn’t fit and got trimmed; apply insulating paper; nickel and copper strip 15 wide, trim the small nickel points on the positive side; charge the welder’s jump starter first.
02:02 – 04:39 4. Everything gets hot during welding: stop and cool down
The current didn’t seem enough, go again; the board, the jump starter and the cells are all too hot to touch, so he keeps stopping to blow on them; the jump starter can’t keep up at 5V2A and the voltage keeps dropping; the self-built machine has added capacitors, shortened leads and swapped MOSFETs, so the current is high and the whole thermal pad is hot; stopwatch stopped.
04:39 – 08:34 5. Pull the Bluetooth BMS from the old 21700 pack; a warning about used cells
While charging, he removes the BMS from a previous 21700 pack; that pack’s salvaged second-hand cells had an absurd delta (0.086–3.876V), never buy them; the BMS is labelled NMC but is a Bluetooth board, and the app can switch between NMC / LiFePO4.
08:34 – 09:01 6. Weld the other face, series connections; too little voltage to weld, wait an hour
One face done, start the series run from the main negative; with copper stacked the current capacity is higher, so never connect it wrong; the 60V20A BMS fits exactly; the voltage is too low to weld and charging is slow, so he waits over an hour.
09:30 – 11:06 7. Won’t weld → two layers of copper by mistake; add nickel to compensate; last group
Suddenly it won’t weld, he thinks a cell is bad, internal resistance checks fine; turns out his eyes missed that two layers of copper were stacked; hot again, add nickel strip to compensate; one metre each of nickel and copper strip was just enough; last group done.
11:12 – 14:44 8. Measure 52.7V / 32mΩ; 704 silicone, double-sided tape, sense leads group by group
Main + to main − 52.7V, total internal resistance 32mΩ; fixed with 704 silicone; mesh double-sided tape holds the ribbon; leads soldered and tinned group by group (the second positive was too short; ‘nearly had an accident’); finally the lead order checks out, ribbon plugged in, 3 hours 40 minutes taken.
14:44 – 20:15 9. LiFePO4 settings in the app; insulating board / temperature probe / insulating paper
Over-voltage protection 3.65V, under-voltage 2.3, reference 3.2, balancing from 3.5; insulating board in, main positive connected, isolated and marked, temperature probe tucked in; the finished pack is a compact 48V15Ah; one metre of insulating paper was just enough; a fairly by-the-book build this time.
20:15 – 23:36 10. Heat-shrink film with a hair dryer; 704 to finish
Don’t leave heat-shrink film in the sun (it wrinkles in two or three hours); he used a heat gun before, a hair dryer works too but must be held very close; more 704, wait for it to cure and fit it to the bike tomorrow.
23:36 – 26:17 11. On the bike: lead-acid at 89; the bay is bigger than expected; adhesive-lined heat-shrink
Lead-acid internal resistance 89mΩ, lithium is lower; the stainless case lid is missing; the battery bay had packing in it and would take 48V30Ah — a miscalculation; adhesive-lined heat-shrink holds firmer and keeps water out; add padding and an insulating board for protection.
26:27 – 29:00 12. Real readings and whether LiFePO4 suits the north
App: highest 3.333V, lowest 3.295V, 0.038V delta, 0.9kW; only 16.5A because the bike is low-power; LiFePO4 isn’t ideal for northern winters, but it’s cheap and safe and fades less than lead-acid.
29:04 – 29:33
Bill of materials
| LiFePO4 cells ×16 | 3.2V 15Ah · Battery pack |
| Nickel-plated steel strip | 0.12 × 15mm, 1m · Connections |
| Copper strip | 0.1 / 0.05mm, 15mm wide, 1m · Stacked welds for more current |
| Self-built welder + jump starter for power ×1 | Added capacitors / swapped MOSFETs · Main welding |
| AWithZ handheld welder ×1 | Comparison / touch-up welds |
| Triple holders | Hold the cells |
| Bluetooth BMS ×1 | 60V 20A · Protection / balancing |
| Insulating paper / insulating board | 1m · Insulation |
| 704 silicone / mesh double-sided tape / adhesive-lined heat-shrink / heat-shrink film | Fixing and wrapping |
| Internal resistance meter / multimeter | Measurement |
| Hair dryer (instead of a heat gun) ×1 | Heat-shrink film |
Measured on camera
| Cell voltage | 3.297 V 01:14 |
| Cell internal resistance | 1.7–2 mΩ 01:18 |
| Total voltage | 52.7 V 14:53 |
| Total internal resistance | 32 mΩ 14:53 |
| Lead-acid battery internal resistance | 89 mΩ 26:27 |
| App on the bike | 53.0V / -16.5A / 14.8Ah / 99.2% / 0.038V delta / 0.9kW 29:05 |
| Old 21700 pack delta | 0.086–3.876V 08:50 |
Creator’s tips
- Charge LiFePO4 cells up before paralleling; you can join positive to positive with small magnets + copper strip to balance-charge them 01:28
- Stack copper strip on nickel for more current; trim the nickel strip’s sharp points on the positive side 00:14
- Keep heat-shrink film out of the sun; without a heat gun, a hair dryer held close will do 23:23
- Adhesive-lined heat-shrink holds firmer and keeps water out 27:55
- Measure the battery bay before fitting — it may be bigger than you think 26:48
Pitfalls
- The self-built welder (added capacitors / swapped MOSFETs) overheated throughout, the jump starter couldn’t keep up, work kept stopping, 3h40m in total 05:00
- Accidentally stacked two layers of copper, thought a cell was bad, couldn’t weld 11:12
- Mismatched holder type (four extra corners) wouldn’t fit 03:26
- ‘Nearly had an accident’ connecting the sense leads 17:17
- Salvaged second-hand cells had an absurd delta — never buy them 08:47
Li-ion safety
- With copper stacked the current capacity is higher; never connect the series run wrong 10:05
- LiFePO4 struggles in northern winters but is safer 29:10
Quotes
Cost & time
| Time | Welding + wiring 3 h 40 min (incl. repeated cooling breaks and an hour waiting on charging) |